
We’ve been messing around with a steel shipping container and quickly learned that container insulation isn’t optional. Those bare metal walls turn into a blast furnace when the sun’s out and an ice chest when it’s freezing. We played with a bunch of materials, tried insulating inside and out, and even hunted for budget hacks. What follows is our down-and-dirty take on keeping that metal box comfy all year.
Key Takeaways
- A bare container feels like an oven in summer and a freezer in winter—container insulation is a game changer.
- Rigid foam panels, fiberglass batts, spray foam, and mineral wool each offer different R-values, costs, and installation quirks.
- Insulating inside saves space but is simpler; wrapping outside protects metal but takes more work; mixing both can be the sweet spot.
- Prepping matters: kill rust, seal every seam, level surfaces, and add a moisture barrier to dodge condensation issues.
- You can DIY with cheap swaps or score leftover materials, but always follow safety steps and double-check R-value needs.
Why Container Insulation Matters
Okay, let’s get real about why insulating a container is a must. We’re not just talking about comfort here; it’s about sanity, savings, and protecting your precious stuff. Think of your container as a metal oven in the summer and an icebox in the winter. Not ideal, right? Let’s break down why insulation is your container’s best friend.
Beat The Scorching Sun
Ever touched a shipping container on a hot summer day? Ouch! That’s because steel loves to absorb heat. Without insulation, your container turns into a furnace. Insulation acts like a shield, keeping the inside cooler and preventing heat from radiating in. This is especially important if you’re storing anything sensitive to high temperatures, like electronics, vinyl records, or even just trying to work inside without melting.
Bounce Back From Arctic Blast
Just as easily as they heat up, shipping containers can get bone-chillingly cold. Insulation works both ways, trapping warmth inside during those freezing months. Imagine trying to use your container as a workshop in the dead of winter without any insulation. Your fingers would be too numb to hold a hammer! Plus, extreme temperature swings can cause condensation, leading to rust and damage. No thanks!
Save Bucks On Bills
Let’s be honest, nobody wants to throw money away on heating and cooling. If you’re using your container as a living space or office, insulation is a game-changer for your energy bills. By keeping the temperature stable, you won’t have to crank up the AC or heater as often. Think of all the extra cash you’ll have for fun stuff – like more container projects!
Here’s a quick look at potential savings:
- Reduced energy consumption
- Lower monthly bills
- Increased property value (if it’s a dwelling)
- Less wear and tear on your HVAC system
Container Insulation Options That Don’t Suck
Alright, let’s talk about insulation methods that won’t make you regret every life choice you’ve ever made. We’ve all seen those insulation fails, and trust us, we’re here to prevent you from becoming a meme. So, ditch the bad ideas, and let’s dive into some options that actually work.
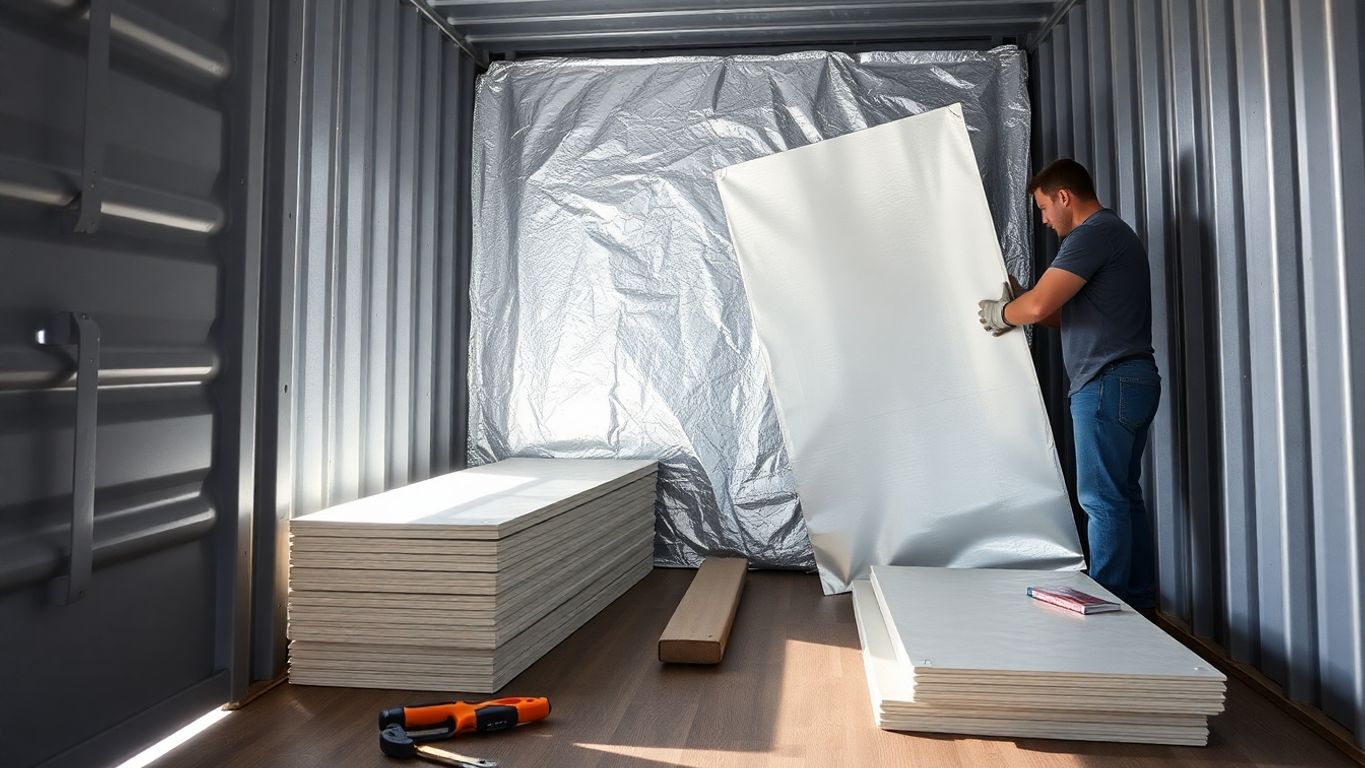
Rigid Styrofoam Panels
These are like the OG of container insulation. They’re cheap, relatively easy to install, and can make a noticeable difference in temperature control. Plus, they help dampen sound, which is a huge win if you’re planning on using your container as a music studio or a place to plot world domination in peace and quiet. Just slap ’em on with some adhesive, and you’re good to go. They’re also easy to replace if one gets damaged.
Fiberglass Batt Fiesta
Fiberglass batts are another common choice, and they’re pretty effective at keeping the heat in (or out, depending on the season). The downside? They can be a bit itchy to work with, so gear up with gloves, a mask, and maybe even a hazmat suit. Seriously, that stuff gets everywhere. Also, you’ll need to build a frame to hold them in place, which adds to the overall project complexity. You can find these at any shipping container equipment store.
Spray Foam Shenanigans
Spray foam is where things get interesting. It’s like giving your container a giant, insulating hug. It fills every nook and cranny, creating an airtight seal that’s tough to beat. The downside? It can get messy, and you need to be careful about ventilation while you’re spraying. Plus, it’s not the cheapest option out there. But if you want maximum insulation with minimal effort, spray foam might be your jam.
Rockin’ Mineral Wool
Mineral wool is the eco-friendly, fire-resistant superhero of the insulation world. It’s made from recycled materials, it doesn’t burn, and it’s a great insulator. It’s a bit pricier than fiberglass, but the benefits are worth it if you’re looking for a sustainable and safe option. Plus, it’s naturally sound-dampening, so you can rock out without disturbing the neighbors (too much).
Choosing the right insulation really depends on your budget, your climate, and how much effort you’re willing to put in. Each of these options has its pros and cons, so do your research and pick the one that best fits your needs. And remember, a well-insulated container is a happy container!
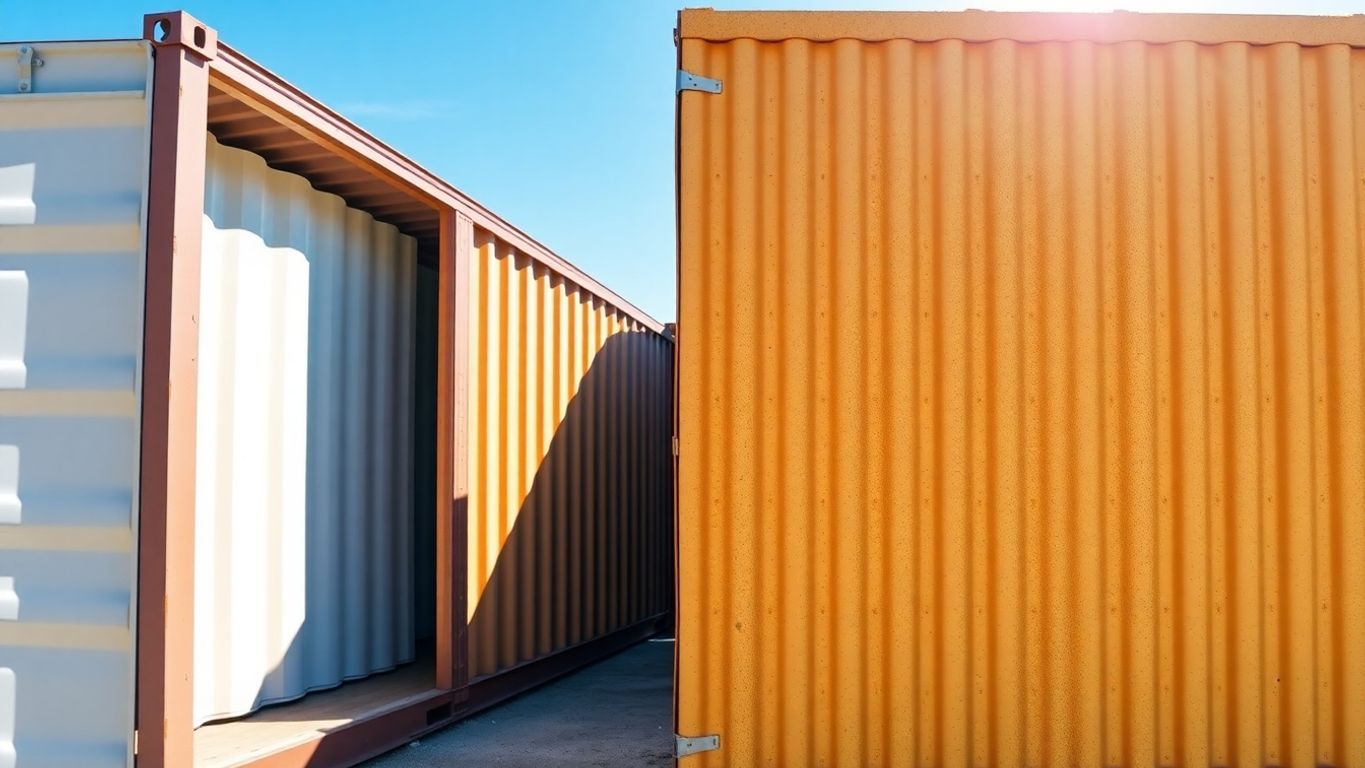
Inside Or Outside—The Great Debate
Alright, so you’re staring at your metal box and wondering, “Where do I even begin with this insulation thing?” One of the first big choices is whether to insulate the inside or the outside. It’s like deciding whether to wear your underwear inside or outside your pants – both are options, but one is definitely more socially acceptable (and practical).
Cozy Interior Layers
Going internal is usually the first thought that pops into people’s heads. It’s like giving your container a nice, warm hug from the inside. The big plus? Your insulation is shielded from the elements. Rain, snow, angry squirrels – none of them can mess with your precious R-value. However, be warned: you’re sacrificing interior space. Think about it – every inch of insulation you add on the inside is an inch you lose for your stuff. If you’re planning on a tiny home, those inches can feel like miles. Also, the more internal walls you have, the more complicated the insulation process becomes.
Badass Exterior Wraps
Now, let’s talk about going external. This is for the bold, the daring, the folks who aren’t afraid to show off their insulation. The main advantage here is that you keep all your interior space. You get to maximize every square inch inside your container, which is awesome. But, and it’s a big but, exterior insulation is exposed to the world. That means you need to protect it from the elements with some kind of cladding or covering. This can add to the cost and complexity of the project. Plus, maintenance might be a bit more involved since you’ll have to keep an eye on the exterior cladding to make sure it’s holding up. Exterior insulation tends to be more expensive to maintain and may require replacement.
Hybrid Hero Strategy
Can’t decide? Why not both? A hybrid approach involves insulating both the inside and outside of your container. This is like wearing two pairs of socks in the winter – maximum warmth and protection. Of course, it’s also the most expensive and labor-intensive option. But if you’re serious about creating a super-insulated, energy-efficient container, it might be worth considering. It’s not uncommon to choose both when creating a living or workspace. Think of it as the ultimate defense against the elements.
Ultimately, the best approach depends on your budget, your climate, and how much space you need inside your container. There’s no one-size-fits-all answer, so weigh the pros and cons carefully before making a decision. And remember, whatever you choose, do it with style!
Prepping Your Metal Beast For Insulation
Alright, team, before we even think about slapping insulation onto our metal box, we’ve got some prep work to do. Think of it like prepping a canvas before painting – except our canvas is a giant steel rectangle that might be rusty and definitely has some weird crevices. Let’s get this done right!
Rust Busting And Cleaning
First things first: rust is the enemy. It’s like the gremlins of shipping containers – ignore it, and it’ll multiply. We need to get rid of any existing rust and prevent new rust from forming. Grab a wire brush, some sandpaper, and maybe even a power tool if you’re feeling ambitious. Scrub away all that flaky rust until you see shiny metal underneath. Then, give the whole container a good wash with soap and water. Let it dry completely before moving on. This is also a good time to inspect for any major dents or damage that might need addressing.
Caulking All The Little Creeps
Shipping containers aren’t exactly known for their airtight seals. There are gaps and cracks everywhere, just waiting for moisture and critters to sneak in. We need to seal those suckers up! Grab a tube of good-quality caulk for shipping containers and go to town. Pay special attention to the corners, seams, and around the doors and windows. Don’t be shy – fill those gaps completely. This step is crucial for preventing condensation and keeping your insulation dry.
Leveling The Playfield
Okay, maybe “leveling” is a bit of an exaggeration, but we need to make sure the interior surface is as smooth and even as possible. Any major bumps or protrusions will make it harder to install the insulation properly. If you’re planning on using rigid foam panels, for example, you’ll want a relatively flat surface to adhere them to. You can use shims or furring strips to create a more even surface. This step might seem tedious, but it’ll pay off in the long run by ensuring a snug and effective insulation job. Remember, we’re aiming for a cozy, condensation-free haven, not a leaky, rusty mess!
Installing Like A Pro Without The Pro Price
Alright, so you’re ready to get those hands dirty and insulate your shipping container like a seasoned pro, but without emptying your bank account. We get it! Hiring someone can cost a fortune, and honestly, where’s the fun in that? Let’s dive into some DIY techniques that’ll have your container feeling cozy in no time.
Snug-Fit Panel Tricks
Working with rigid insulation panels can be a bit like wrestling a cardboard alligator, but with a few tricks, you’ll be taming those panels in no time. First off, measure everything twice, cut once. Seriously, this saves so much headache (and material).
Here’s a few things we’ve learned:
- Use a sharp utility knife for clean cuts. Dull blades are your enemy.
- Slightly oversize the panels and then gently compress them into place for a snug fit. This minimizes air gaps.
- Construction adhesive is your friend. Apply it liberally to the back of the panels before sticking them to the container walls. Think of it as insulation glue.
Pro Tip: For those tricky corners and edges, grab a can of expanding foam. It’s like caulk’s overachieving cousin and fills gaps like a champ.
Foam Gun Finesse
Spray foam insulation is awesome, but it can also get messy real quick. The key is finesse, not force. Think of it like frosting a cake – you want even coverage, not a mountain of foam in one spot.
- Start with a light coat. It’s better to build up layers than to try and do it all at once.
- Keep the nozzle moving at a steady pace. No one wants foam stalactites hanging from their container ceiling.
- Wear gloves and eye protection. Seriously, this stuff sticks to everything, including you.
Safety Dance Moves
Insulating a shipping container isn’t exactly a walk in the park. There are some safety precautions you absolutely need to take. We’re talking about protecting your lungs, eyes, and skin.
- Always wear a respirator when working with spray foam or fiberglass. You don’t want to be breathing in those nasty particles.
- Eye protection is a must. Safety glasses or goggles will keep your peepers safe from flying debris and chemical splashes.
- Gloves are your friend. Protect your hands from adhesives, foam, and sharp edges.
And hey, don’t forget to ventilate the container while you’re working. Fresh air is always a good idea. Securing container financing is one thing, but securing your health is another!
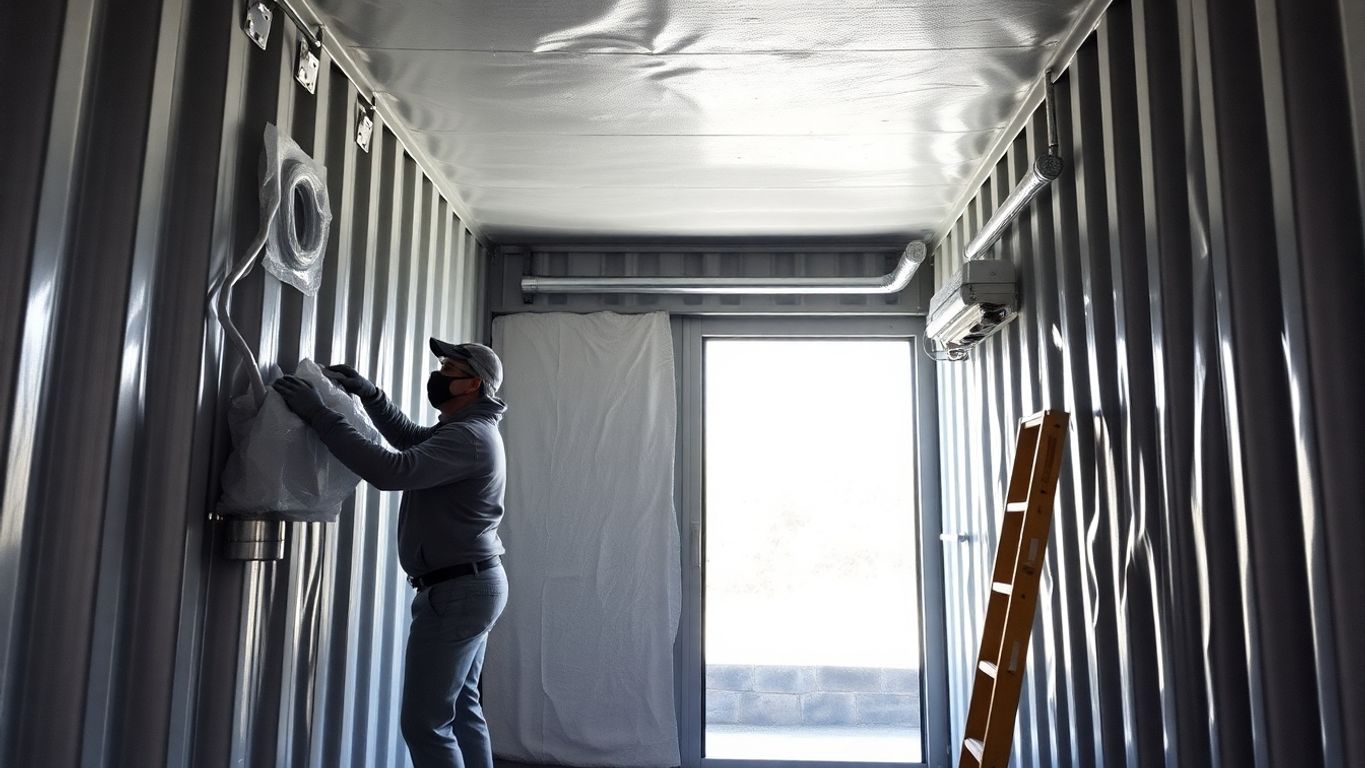
Vapor Barriers And Moisture Control
Alright, let’s talk about something super important but often overlooked: vapor barriers and moisture control. Trust us, you don’t want to skip this step unless you’re cool with rust and mold turning your container into a science experiment. We’re not!
Why You Can’t Ignore Condensation
Okay, so picture this: warm, moist air inside your container meets the cold steel walls. What happens? Condensation, baby! And condensation leads to rust, mold, and a whole host of other nasty problems. Think of your container like a giant metal can – it sweats. Ignoring condensation is like inviting all the neighborhood gremlins to a party inside your precious metal box. We need to manage that moisture, or else our insulation efforts will be for nothing. Especially if you’re planning on using your container as a container office, you’ll want to keep it dry.
Barrier Types That Rock
So, what’s our weapon of choice against the dreaded condensation? Vapor barriers! There are a few different types, and each has its pros and cons:
- Polyethylene Sheeting: This is your basic, affordable option. It’s basically a big roll of plastic. It works, but it’s not the most durable and can be a pain to seal properly.
- Foil-Faced Barriers: These are a bit fancier. The foil helps reflect radiant heat, adding a little extra insulation oomph. Plus, they’re generally more durable than polyethylene.
- Vapor Retarder Paint: Yep, you can paint on a vapor barrier! These paints create a membrane that reduces moisture transfer. Easy to apply, but maybe not as effective in super humid climates.
Choosing the right barrier depends on your climate, your insulation type, and your budget. Do your homework! And remember, a little extra protection never hurts.
Seal It And Feel It
Listen up, because this is where things get real. A vapor barrier is only as good as its seal. If you’ve got gaps and cracks, moisture will find a way in. So, grab your trusty equipment enclosures, and get ready to caulk like your life depends on it. Pay special attention to seams, edges, and any penetrations (like around windows or doors). Overlap your barrier sheets generously, and use vapor barrier tape to seal the seams. Think of it as wrapping a present for a moisture monster – you want to make it impossible to get in! If you’re using batt insulation for your living spaces, make sure the vapor barrier is facing the warm side of the wall. Trust us, your future self will thank you.
R-Values Demystified For Lazy People
Alright, let’s talk R-values. We get it, numbers are boring. But trust us, understanding this stuff will save you a headache (and some serious cash) down the road. Think of R-values as the insulation world’s version of horsepower – but instead of measuring speed, it measures resistance to heat flow. The higher the R-value, the better the insulation’s ability to keep heat where you want it (either inside during winter or outside during summer). Basically, it’s the difference between your container being a comfy haven and a sweltering/freezing metal box.
What R Actually Means
Okay, so what does R even stand for? Resistance! It’s a measure of how well a material resists heat flow. Think of it like this: a higher R-value is like having a really thick coat on a cold day. The thicker the coat (or the higher the R-value), the less you feel the cold. Simple, right? Different materials have different R-values per inch of thickness. For example, spray foam generally has a higher R-value per inch than fiberglass batts. This means you might need less spray foam to achieve the same level of insulation. Understanding this helps when comparing costs and installation methods.
Picking The Sweet Spot
So, how do you pick the right R-value for your outside shipping containers? It’s not a one-size-fits-all kind of deal. Several factors come into play, including your climate, what you’re using the container for, and your budget. If you live in a place where it’s always hot or always cold, you’ll want a higher R-value. If you’re just using the container for storage, you might be able to get away with a lower R-value. Here’s a super basic guide:
- Mild Climates: R-13 to R-19
- Moderate Climates: R-19 to R-30
- Extreme Climates: R-30+
Keep in mind that these are just general recommendations. Always check local building codes and consider your specific needs.
When To Go High Or Chill
Alright, let’s get down to the nitty-gritty. When should you splurge on high R-values, and when can you chill out with something more budget-friendly? If you’re planning on living or working in your container, especially in a place with extreme temperatures, going high is a must. Think of it as an investment in your comfort and sanity. Plus, you’ll save a ton on heating and cooling bills in the long run. On the other hand, if you’re just storing stuff that isn’t temperature-sensitive (like holiday decorations or that questionable collection of Beanie Babies), you can probably get away with lower R-values. Just make sure you’re still protecting your stuff from moisture and condensation. Remember, insulation isn’t just about temperature; it’s also about protecting your container and its contents from the elements.
Ultimately, choosing the right R-value is about finding the balance between cost, comfort, and energy efficiency. Don’t be afraid to do some research, ask for advice, and consider your specific needs. With a little bit of planning, you can create a container that’s perfectly insulated for your needs, without breaking the bank.
Budget Hacks To Keep Wallet Happy
Alright, let’s be real. Insulating a shipping container can feel like staring into a money pit. But fear not, fellow DIY warriors! We’re here to share some sneaky ways to insulate your metal box without emptying your bank account. It’s all about being resourceful and a little bit clever.
Material Swaps That Work
- Denim Insulation: Old jeans? Turn them into insulation! Seriously, shredded denim is surprisingly effective and eco-friendly. Just make sure they’re clean (nobody wants musty-smelling insulation).
- Recycled Pallet Wood: If you’re going for a rustic vibe, pallet wood can be used to create an inner wall with an air gap, adding a bit of insulation. Plus, it’s often free for the taking (just check for treatment chemicals!).
- Bubble Wrap Bonanza: Okay, it’s not the best insulation, but multiple layers of bubble wrap can provide a decent thermal break, especially if you score it for free from local businesses. Think of it as a budget-friendly first layer.
DIY Vs Hiring A Sidekick
Okay, so you’re thinking about going full DIY on this insulation project? Awesome! But let’s be honest with ourselves. Are you actually handy, or do you just think you are? There’s no shame in admitting that some jobs are better left to the pros. However, if you’re confident in your skills, DIY can save you a ton of cash. Here’s the breakdown:
- DIY Pros: Huge cost savings, learn new skills, bragging rights.
- DIY Cons: Time-consuming, potential for mistakes, tool investment.
- Hiring Pros: Faster completion, professional results, less stress.
- Hiring Cons: Expensive, finding a reliable contractor, less control.
Consider a hybrid approach. Maybe you tackle the easier tasks like cleaning and prepping the container, while hiring someone for the trickier stuff like spray foam insulation. This way, you save money without getting in over your head.
Score Freebies On Leftovers
Never underestimate the power of scavenging! Construction sites, renovation projects, and even online marketplaces can be goldmines for leftover insulation materials. Here’s how to play the game:
- Befriend Contractors: A friendly chat with a local contractor can sometimes lead to them offering you leftover materials they’d otherwise throw away. It’s all about networking!
- Online Marketplaces: Keep an eye on sites like Craigslist or Facebook Marketplace for people selling or giving away leftover insulation, plywood, or other building materials. You might just score a sweet deal.
- Construction Site Dumpster Diving (With Permission!): Okay, dumpster diving might sound extreme, but with the site manager’s permission, you might find perfectly usable scraps of insulation that would otherwise end up in the landfill. Just be safe and wear gloves!
Remember, insulating your shipping container doesn’t have to break the bank. With a little creativity and elbow grease, you can create a comfortable and energy-efficient space without sacrificing your financial sanity. And if you’re planning on using your container for shipping container storage, proper insulation is even more important!
Common Container Insulation Fails (And How To Avoid Them)
We’ve all been there, staring at a project gone sideways, wondering where it all went wrong. Insulating a shipping container is no different. Let’s dive into some common pitfalls and, more importantly, how to dodge them like a pro.
Missing The Air Gaps
Okay, so you’ve slapped insulation everywhere, right? Wrong! Leaving air gaps is like inviting condensation to a party. Air gaps can negate all your hard work. Make sure every nook and cranny is sealed tight. We’re talking about the spaces around doors, windows, and any other openings. Use expanding foam or caulk to fill those gaps. Think of it as giving your container a cozy, airtight hug.
Skipping The Barrier
This is a biggie. Seriously, don’t even think about skipping the vapor barrier. Without it, moisture will creep into your insulation, turning it into a soggy, moldy mess. And nobody wants that. A vapor barrier is a thin material, usually plastic, that prevents moisture from passing through. Install it on the warm side of your insulation (usually the interior). Overlap the seams and tape them securely. It’s like wrapping your insulation in a raincoat – essential for long-term success. You can find vapor barrier options at most hardware stores.
Overstuffing The Walls
More isn’t always better, folks. Cramming too much insulation into the walls can actually reduce its effectiveness. When insulation is compressed, it loses its ability to trap air, which is what gives it its insulating power. Plus, overstuffing can create pressure points that lead to condensation. Use the right amount of insulation for the space you have, and don’t try to force it in. It’s like trying to squeeze into your skinny jeans after Thanksgiving dinner – uncomfortable and counterproductive.
Think of your container as a living, breathing thing (okay, maybe not breathing, but you get the idea). It needs to be able to manage moisture and temperature changes. By avoiding these common mistakes, you’ll create a comfortable, energy-efficient space that will last for years to come.
Here’s a quick rundown of what to avoid:
- Unsealed air gaps
- No vapor barrier
- Over-compressed insulation
- Ignoring proper ventilation
Keeping Your Container Chill (And Toasty) Year Round
Okay, so you’ve insulated your shipping container. Awesome! But the job’s not quite done. Now, we gotta think about long-term temperature control container and how to keep that baby comfortable no matter what Mother Nature throws at it. Let’s dive into some strategies to maintain that perfect container climate control.
Smart Thermostat Shenanigans
Forget those old-school thermostats. We’re talking smart thermostats, people! These little gadgets learn your habits and adjust the temperature automatically. Plus, you can control them from your phone. Imagine pre-heating your container office on a frosty morning before you even get out of bed. Pure bliss!
- Set schedules based on your usage patterns.
- Remotely adjust the temperature when you’re away.
- Monitor energy consumption to optimize settings.
Ventilation Vibes
Insulation is great, but it’s not a magic shield. You still need proper ventilation to prevent moisture buildup and keep the air fresh. Think of it like this: insulation is the sweater, ventilation is the deodorant. You need both!
Proper ventilation is key to preventing condensation and maintaining air quality inside your container. Stale air can lead to mold and mildew, which nobody wants.
Maintenance Without The Snooze
Just like your car or your teeth, your insulated container needs regular check-ups. A little maintenance goes a long way in preventing big problems down the road. Plus, it’s a good excuse to spend some quality time with your metal box.
- Inspect your refrigerated containers for any signs of damage or wear.
- Check caulking and seals annually and reapply as needed.
- Clean ventilation systems to ensure proper airflow.
Keeping your shipping container cool in summer and warm in winter is easier than you think. A bit of insulation, some shade, or a small heater can help a lot. Ready to protect your gear? Visit our site and get a free quote now!
Conclusion
We jumped headfirst into how to tame steel walls that bake us in July and turn into ice blocks in January. We checked out foam boards, spray foam, mineral wool, and even thrift-store blankets. Some methods made us feel like champs, others left us covered in sticky spray foam (oops). At the end of the day, tossing a bit of padding onto our container means cooler summers, warmer winters, and smaller power bills. So grab your gloves, pick your favorite insulation hack, and let’s turn that tin box into a cozy spot. We promise it’ll be worth the mess.