
So, we’re diving into something super cool today: hydroponic farming in shipping containers. It’s like turning an old metal box into a super productive garden, right in the middle of the city. We’re gonna walk you through everything, from why these things are awesome to how to get your own little green oasis going. Get ready to grow some serious grub!
Key Takeaways
- Hydroponic farming in shipping containers lets us grow food pretty much anywhere, even in crowded cities.
- There are different ways to do this, like Deep Water Culture or Nutrient Film Technique, and each has its own vibe.
- Setting up your container farm means figuring out where it goes, how to power it, and getting the water just right.
- Lights are a big deal for these indoor farms, so picking the right ones for your plants is super important.
- You can grow all sorts of stuff in these containers, from leafy greens to yummy strawberries.
Why Hydroponic Farming in Shipping Containers is Totally Rad
What’s the Big Deal About Container Farms Anyway?
Okay, so you’ve heard whispers about container farm systems, but you’re not quite sure what all the fuss is about? Let us break it down for you. Imagine taking a regular old shipping container and turning it into a high-tech, plant-growing paradise. That’s the basic idea! These aren’t your grandma’s garden sheds; they’re climate-controlled, nutrient-optimized, and ready to produce some serious greens.
Think of it like this:
- Year-round growing, no matter the weather outside.
- Less water usage compared to traditional farming.
- The ability to grow food practically anywhere.
Container farms are like the Swiss Army knives of agriculture. They’re versatile, efficient, and surprisingly cool.
Why Your Lettuce Will Thank You (and the Planet Too!)
Beyond the sheer coolness factor, there are some seriously good reasons to jump on the container farm bandwagon. For starters, it’s way more sustainable. We’re talking reduced water consumption, less reliance on pesticides, and the ability to grow food closer to where people actually live. That means fewer food miles and a smaller carbon footprint. Plus, your lettuce will be living its best life in a perfectly controlled environment, free from pests and diseases. It’s a win-win for everyone!
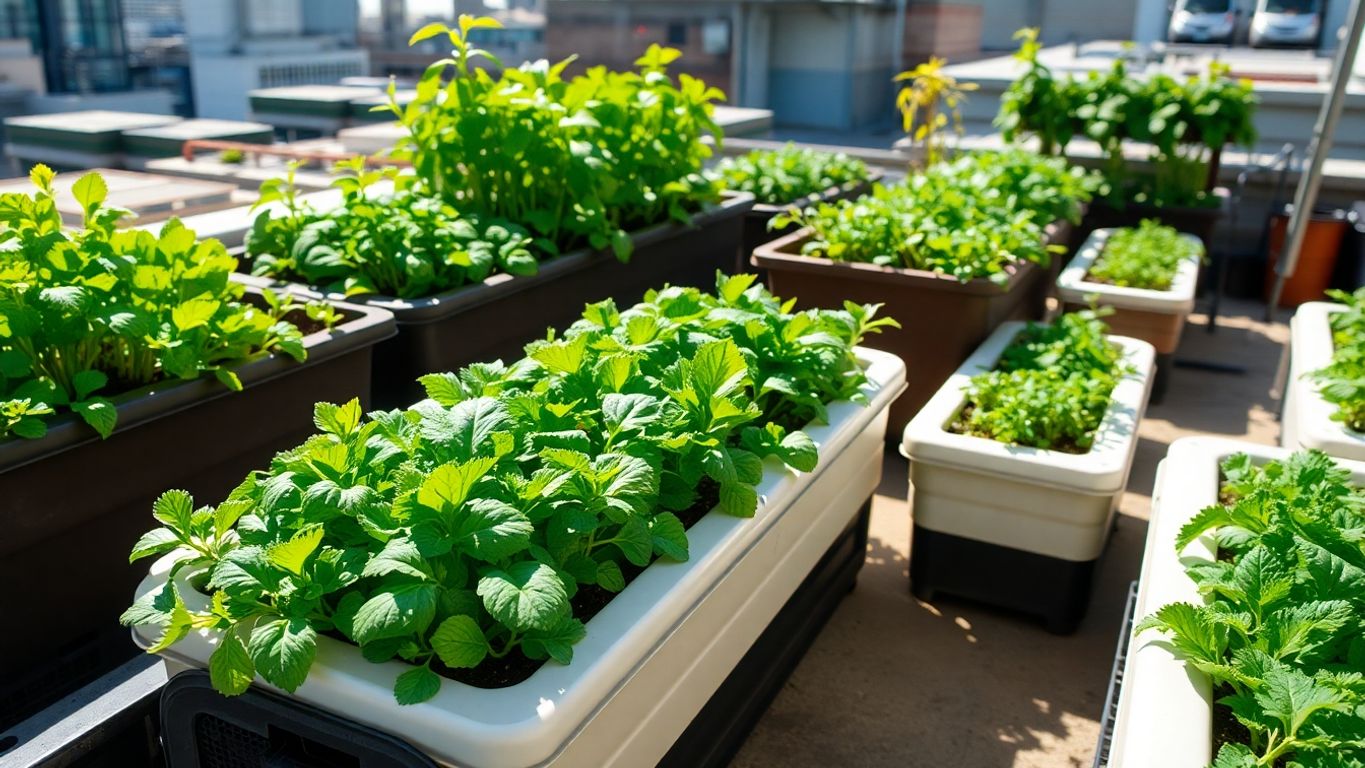
From Concrete Jungle to Green Oasis: Urban Farming Dreams
Ever dreamed of having a farm in the middle of the city? With container farms, that dream can become a reality. These self-contained units can be placed just about anywhere – rooftops, parking lots, vacant lots – transforming urban spaces into thriving agricultural hubs. Imagine fresh, locally grown produce available right in your neighborhood. It’s not just about food; it’s about creating greener, more sustainable communities. We can bring the farm to the people, one container farm system at a time!
Picking Your Perfect Pod: Types of Hydroponic Container Farms
Okay, so you’re ready to jump into the world of container hydroponics. Awesome! But before you start chucking seeds into water, let’s talk about the different ways you can actually grow stuff in these metal boxes. It’s not a one-size-fits-all situation, and picking the right method can make a huge difference in how successful your hydroponic setup container turns out. Think of it like choosing the right tool for the job – you wouldn’t use a hammer to paint a wall, right?
The OG: Deep Water Culture (DWC) for the Chill Plants
Deep Water Culture, or DWC, is like the chill grandpa of hydroponics. It’s simple, relatively cheap, and pretty darn effective. Basically, you suspend the roots of your plants in a nutrient-rich water solution. An air pump keeps the water oxygenated, preventing the roots from drowning. It’s perfect for leafy greens and herbs that don’t mind getting their feet wet.
Think of it as a plant spa. The plants just hang out, soaking up all the good stuff. The downside? It’s not ideal for larger, heavier plants, and temperature control can be a bit tricky. But for beginners, DWC is a great place to start.
Nutrient Film Technique (NFT): When Your Plants Like a Little Flow
NFT is like DWC’s more sophisticated cousin. Instead of sitting in a tub of water, the plant roots are exposed to a shallow stream of nutrient solution that constantly flows over them. This provides a constant supply of food and oxygen. It’s like a tiny river running through your plants’ root systems.
NFT is great for plants that like a consistent supply of nutrients, like lettuce and strawberries. It’s also pretty space-efficient. However, it can be a bit more complex to set up and maintain than DWC. If the pump fails, your plants can dry out pretty quickly, so you need to keep an eye on things.
Aeroponics: Because Plants Can Fly (Sort Of)
Aeroponics is where things get a little sci-fi. Instead of water, the plant roots are suspended in the air and periodically sprayed with a nutrient solution. It’s like giving your plants a regular shower of food. This method is super efficient because the roots get tons of oxygen, leading to faster growth.
Aeroponics is often used in commercial operations because it can produce high yields in a small space. However, it’s also the most complex and expensive of the three methods. You need precise timers, nozzles, and a reliable pump. If anything goes wrong, your plants can suffer quickly. But if you’re looking for the cutting edge of hydroponic farming, aeroponics is where it’s at.
Setting Up Your Hydroponic Haven: The Nitty-Gritty
Alright, let’s get down to brass tacks. You’ve got your container, you’ve got dreams of leafy greens, but now what? Setting up your hydroponic system isn’t rocket science, but it does require a bit of planning and elbow grease. Think of it as building a tiny, self-contained ecosystem – a plant paradise if you will. We’re about to turn that metal box into a thriving garden. Let’s dive in!
Location, Location, Location: Where to Park Your Plant Palace
First things first: where are you gonna put this thing? It’s not like you can just plop it down anywhere. Here’s the lowdown:
- Sunlight: Even with grow lights, natural light is your friend. South-facing spots are usually best.
- Accessibility: You’ll need to get in and out to tend to your plants, so make sure there’s enough space around the container.
- Level Ground: Seriously, don’t skip this. Uneven ground can mess with your water levels and cause all sorts of problems.
Think about the long game. Are you planning on expanding your urban hydroponics operation later? Leave room for growth! We don’t want you moving a ton of dirt later.
Powering Up: Keeping Those Lights On (and Your Plants Happy)
Okay, so you’ve got your location sorted. Now, let’s talk electricity. Plants need light, and grow lights need power. Here’s what you need to consider:
- Amperage: Figure out how much power your lights and other equipment will draw. You don’t want to trip a breaker every five minutes.
- Outlets: Make sure you have enough outlets, and that they’re properly grounded. Safety first, people!
- Extension Cords: Use heavy-duty extension cords if needed, and avoid daisy-chaining them. Fire hazard alert!
Consider hiring an electrician to install dedicated circuits if you’re running a lot of equipment. It’s an investment that can save you headaches (and potential fires) down the road.
Water, Water Everywhere: Getting Your H2O Just Right
Hydroponics is all about water, so getting your water system dialed in is super important. Here’s the deal:
- Water Source: You’ll need a reliable source of clean water. Tap water is usually fine, but you might want to test it for pH and mineral content.
- Reservoir: This is where you’ll store your nutrient solution. Make sure it’s big enough to hold plenty of water, and that it’s easy to clean.
- Pumps and Tubing: You’ll need a pump to circulate the water, and tubing to connect everything. Choose food-grade materials to avoid contaminating your plants.
| Component | Description
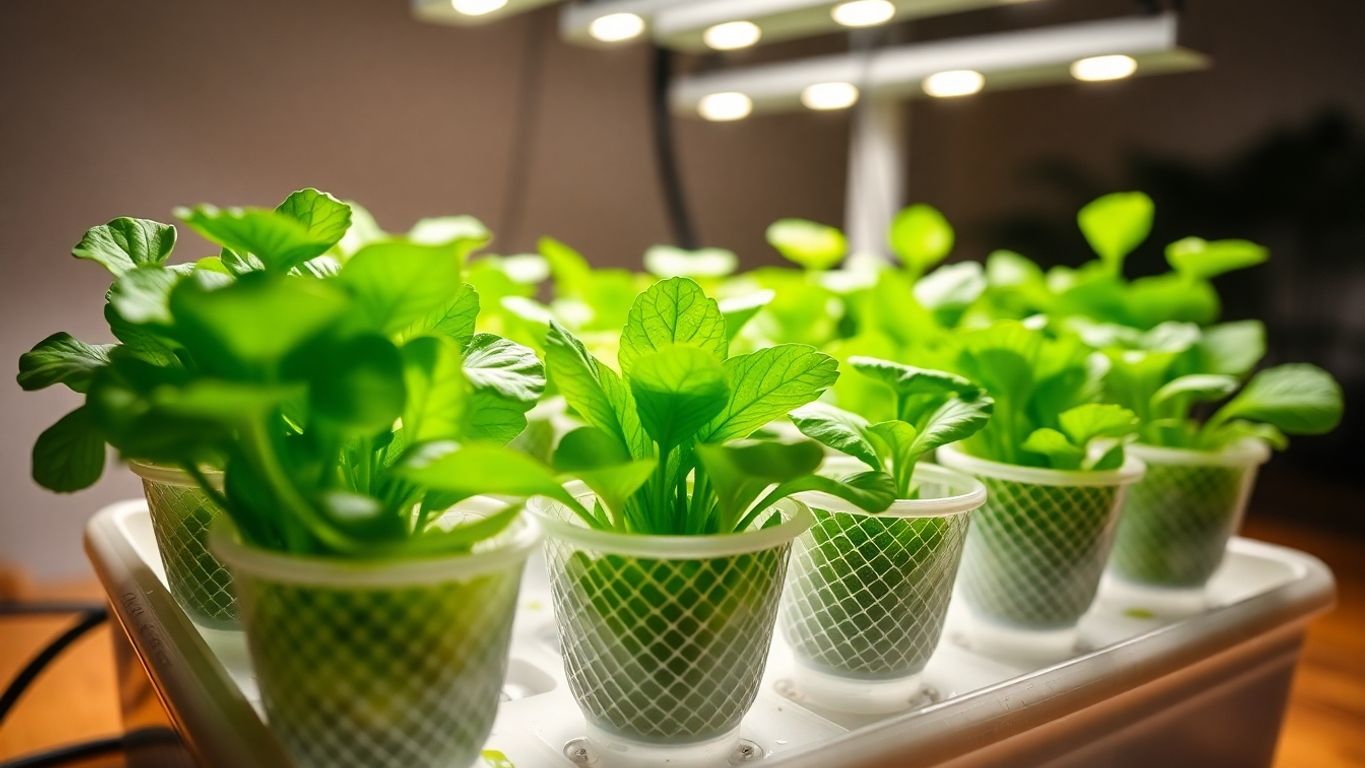
Lighting Up Your Life (and Your Plants!): The Glow-Up Guide
Sunlight vs. Super-Duper Grow Lights: The Showdown
Alright, let’s talk about light – the lifeblood of our leafy friends. We all know the sun is great, right? Free, abundant, and gives you a tan (if you’re a plant, anyway). But can you rely on it for your container farm? Maybe. Depends on where you’ve parked your container upgrades. If you’re in sunny San Diego, you might be golden. If you’re in a basement in Seattle, probably not.
Here’s the deal:
- Sunlight: Free, natural, but inconsistent. Think clouds, seasons, and that pesky building next door blocking all the good rays.
- Grow Lights: Consistent, controllable, but cost money and electricity. Think of them as the sun, but on your terms.
- The Showdown: It’s all about balance. If you can supplement natural light with grow lights, that’s ideal. If not, don’t sweat it – grow lights can do the job solo.
Consider the location of your container farm and the amount of natural light it receives. This will heavily influence your decision on whether to use supplemental grow lights or rely solely on artificial lighting.
Why Your Plants Need a Tan (Even Indoors)
Okay, so plants don’t actually get tans, but they do need light to do their thing – photosynthesis. It’s how they turn light into food, and without it, they’re basically just green decorations. Different plants need different amounts of light, and different spectrums of light. Think of it like this: some plants are sunbathers, and some prefer the shade. Some like tanning oil, and some prefer a good sunscreen.
Choosing the Right Bulb for Your Buds
So, you’ve decided to go the grow light route? Awesome! Now comes the fun part: choosing the right bulb. It’s not as simple as grabbing any old lightbulb from the hardware store. We’re talking specialized lights here, folks. Here’s a quick rundown:
- LEDs: Energy-efficient, long-lasting, and come in a variety of spectrums. They’re the cool kids of the grow light world.
- Fluorescent Lights (T5/T8): Affordable and good for leafy greens. They’re like the reliable minivan of grow lights – not flashy, but they get the job done.
- High-Intensity Discharge (HID) Lights (HPS/MH): Powerful and great for flowering plants. They’re the sports cars of grow lights – fast and furious, but they use a lot of gas (electricity).
| Light Type | Pros | Cons |
|---|---|---|
| LED | Energy-efficient, long-lasting, customizable spectrum | More expensive upfront |
| Fluorescent | Affordable, good for leafy greens | Less intense, need to be closer to plants |
| HID | Very intense, good for flowering, high yields | High energy consumption, produce a lot of heat, require ventilation |
Choosing the right bulb depends on what you’re growing and your budget. Do some research, ask around, and don’t be afraid to experiment. After all, we’re all just trying to help our plants live their best, most well-lit lives!
Tools of the Trade: What Every Hydroponic Farmer Needs
Alright, so you’re diving into the world of container hydroponics? Awesome! But before you start dreaming of endless harvests, let’s talk about the gear you’ll need. Think of it like this: you wouldn’t try to bake a cake without a mixing bowl, right? Same deal here. We’re not talking about needing a whole hardware store, but there are some essentials that’ll make your life (and your plants’ lives) way easier. Let’s get into it!
Beyond the Basics: Gadgets and Gizmos for Green Thumbs
Okay, so we’ve got the must-haves covered. Now, let’s talk about the fun stuff! These aren’t strictly necessary, but they can seriously up your hydroponic game. Think of them as the power-ups in your favorite video game. First up, we’ve got pH meters and TDS (Total Dissolved Solids) meters. These little gadgets are like having a personal scientist on hand, constantly checking the balance of your nutrient solution. No more guessing if your plants are getting the right stuff! Then there’s the automatic timer for your lights and pumps. Seriously, who wants to be a slave to their plants? Set it and forget it, my friends. And finally, a good quality grow tent can be a game-changer, especially if you’re in a less-than-ideal environment. It helps control temperature, humidity, and light, giving your plants the perfect little ecosystem to thrive in.
Monitoring Your Mini-Farm: Keeping an Eye on Things
So, you’ve got your system set up, your plants are growing, and everything seems to be going smoothly. Great! But don’t get complacent. Hydroponics is a bit like having a pet – you need to keep an eye on things to make sure everything’s healthy and happy. Regular monitoring is key to preventing problems before they become full-blown disasters. We’re talking about checking the pH and nutrient levels of your water regularly. A sudden spike or drop can indicate a problem, like a nutrient imbalance or a buildup of algae. Also, keep a close watch on your plants themselves. Are the leaves looking droopy or discolored? Are there any signs of pests or diseases? Catching these things early can save you a lot of headaches down the road. And don’t forget to check the temperature and humidity in your growing area. Plants are picky about their environment, so keeping things consistent is crucial. A local supplier can help you find the right tools for monitoring.
Cleaning Crew: Keeping Your System Squeaky Clean
Alright, let’s talk about the not-so-glamorous side of hydroponics: cleaning. Yeah, it’s not the most exciting part, but trust us, it’s super important. A dirty hydroponic system is like a breeding ground for all sorts of nasty stuff, like algae, bacteria, and fungi. And those things can wreak havoc on your plants. So, how do you keep things squeaky clean? First off, regular water changes are a must. This helps prevent the buildup of nutrients and other gunk. Also, make sure to clean your reservoir and other components regularly with a mild disinfectant. And don’t forget about your growing medium! If you’re using something like rockwool or coco coir, it’s important to rinse it thoroughly before use and replace it regularly. Think of it as spring cleaning for your plants. A clean system is a happy system, and happy plants mean a happy farmer!
Keeping your hydroponic system clean is not just about aesthetics; it’s about preventing diseases and ensuring your plants get the nutrients they need without competition from unwanted organisms. Regular maintenance is key to a thriving hydroponic garden.
Here’s a quick list of cleaning tasks to keep in mind:
- Weekly: Check and clean water lines and emitters.
- Monthly: Empty and scrub the reservoir.
- Every Crop Cycle: Sanitize the entire system before starting a new batch of plants.
From Seed to Supper: Getting Your Plants Started
Okay, team, let’s talk about where the magic really begins: the seeds! It’s not just about throwing some stuff in dirt and hoping for the best. We’re aiming for a controlled explosion of green goodness, right? So, let’s get down to the nitty-gritty of starting your plants.
Seed Shopping: Where to Find Your Future Food
First things first, where do we even get these tiny potential salads? You’ve got options, my friends. You can hit up your local garden center, browse online seed catalogs (prepare to be overwhelmed!), or even save seeds from your favorite veggies. Just make sure you’re getting seeds that are suitable for hydroponics. Not all seeds are created equal, and some are better suited for soil than our water-based adventures. Look for terms like “hydroponic-friendly” or varieties known for thriving in these systems. Also, consider what you actually like to eat. No point in growing a ton of kale if you’re just going to stare at it sadly in the fridge.
Sprouting Success: The Art of Germination
Alright, you’ve got your seeds. Now what? Germination, baby! This is where we wake those little guys up and get them ready to grow. We usually start seeds in a separate, controlled environment before moving them into the main hydroponic setup. Here’s the lowdown:
- Paper Towel Method: Dampen a paper towel, place your seeds inside, fold it over, and put it in a plastic bag. Keep it in a warm, dark place. Check daily and keep the paper towel moist. This is a classic for a reason!
- Seedling Trays: Use small trays with a seed-starting mix (like coco coir or peat moss). Plant seeds according to package directions, keep moist, and provide light once they sprout.
- Rockwool Cubes: These are popular in hydroponics. Soak the cubes in water, plant your seeds, and keep them moist. They provide good support for the seedlings.
No matter which method you choose, remember that moisture and warmth are key. Don’t let those seeds dry out! And be patient – some seeds sprout faster than others. We’re not rushing nature, just giving it a gentle nudge.
Transplanting Tales: Moving Your Babies to Their New Home
Okay, your seedlings have sprouted, and they’re looking strong and healthy. Time to move them into the hydroponic system! This is a delicate operation, so handle with care. Here’s what we do:
- Prepare Your System: Make sure your hydroponic system is ready to go with the nutrient solution at the correct levels.
- Gently Remove Seedlings: Carefully remove the seedlings from their starting medium. If you used rockwool cubes, you can transplant the whole cube. If you used soil or a seed-starting mix, gently wash away as much of the medium as possible without damaging the roots.
- Place in Hydroponic System: Place the seedlings into the net pots or other containers in your system. Make sure the roots are in contact with the nutrient solution. You might need to use some support material (like more rockwool or clay pebbles) to keep them stable.
And that’s it! You’ve successfully transplanted your seedlings. Now, keep a close eye on them for the first few days to make sure they’re adjusting well. Watch for any signs of stress, like wilting or yellowing leaves. With a little care and attention, your seedlings will be thriving in their new hydroponic home in no time. Remember, hydroponic farming in shipping containers is all about creating the perfect environment, and that starts from the very beginning!
Feeding Frenzy: Nutrients, Fertilizers, and Happy Plants
Alright, folks, let’s talk about what your plants are gonna be chowing down on. It’s not just about water; these little guys need a balanced diet to really thrive. Think of us as chefs, whipping up the perfect meals for our leafy customers. We’re not just throwing stuff in; we’re crafting a culinary experience! So, let’s get into the nitty-gritty of nutrients, fertilizers, and how to keep your plants saying, “More, please!”
What’s for Dinner? Understanding Plant Nutrients
So, what exactly do plants eat? It’s not pizza, sadly. They need a mix of macronutrients and micronutrients. Macronutrients are the biggies: nitrogen (N), phosphorus (P), and potassium (K). You’ll see these on fertilizer labels as the NPK ratio. Nitrogen helps with leafy growth, phosphorus is for roots and flowering, and potassium is like the plant’s overall health booster. Then you’ve got micronutrients like iron, manganese, and zinc, which are needed in smaller amounts but are still super important. Think of them as vitamins for your plants. We need to understand hydroponic nutrients to get this right.
Mixing It Up: Your Guide to Nutrient Solutions
Okay, now for the fun part: making the magic potion! You can buy pre-mixed nutrient solutions, which is super easy, or you can mix your own from dry salts. If you’re mixing your own, be precise! Too much or too little of something can throw everything off. We usually use a PPM (parts per million) meter to check the concentration. It’s like baking; you can’t just eyeball it (well, you can, but don’t blame us if your cake—or lettuce—flops). Here’s a basic guide:
- Start with good water: Tap water can have chlorine or other stuff that messes with nutrients. Filtered or RO (reverse osmosis) water is best.
- Mix in the right order: Usually, you add calcium nitrate first, then the other nutrients. Check the instructions on your specific fertilizer.
- Check your pH: Plants like a slightly acidic pH, usually around 5.5 to 6.5. Use pH up or down solutions to adjust.
Remember, every plant is different. What works for lettuce might not work for tomatoes. Do some research and adjust your nutrient solution accordingly.
Pest Patrol: Keeping Unwanted Guests Out of Your Garden
Ugh, pests. The bane of every gardener’s existence. Even in a controlled environment like a container farm, they can sneak in. Aphids, spider mites, fungus gnats – the usual suspects. But don’t worry, we’ve got some tricks up our sleeves. First, prevention is key. Keep your system clean, and inspect your plants regularly. If you spot something, act fast! Here are some things we do:
- Neem oil: A natural insecticide that works on a lot of pests. We spray it on the plants, making sure to get both sides of the leaves.
- Sticky traps: Yellow sticky cards attract and trap flying insects like fungus gnats.
- Beneficial insects: Ladybugs and lacewings eat aphids and other pests. It’s like having a tiny army of bodyguards for your plants!
And remember, avoid harsh chemicals if you can. We’re trying to grow healthy food here, not poison! With a little vigilance, we can keep those unwanted guests out and keep our plants happy and healthy.
What Can You Grow in These Awesome Boxes?
Okay, so you’ve got your container farm all set up. Now comes the fun part: deciding what to actually grow in it! The possibilities are pretty vast, but let’s break down some of the most popular and rewarding options for your hydroponic haven. We’re talking about turning that metal box into a veritable garden of eatin’.
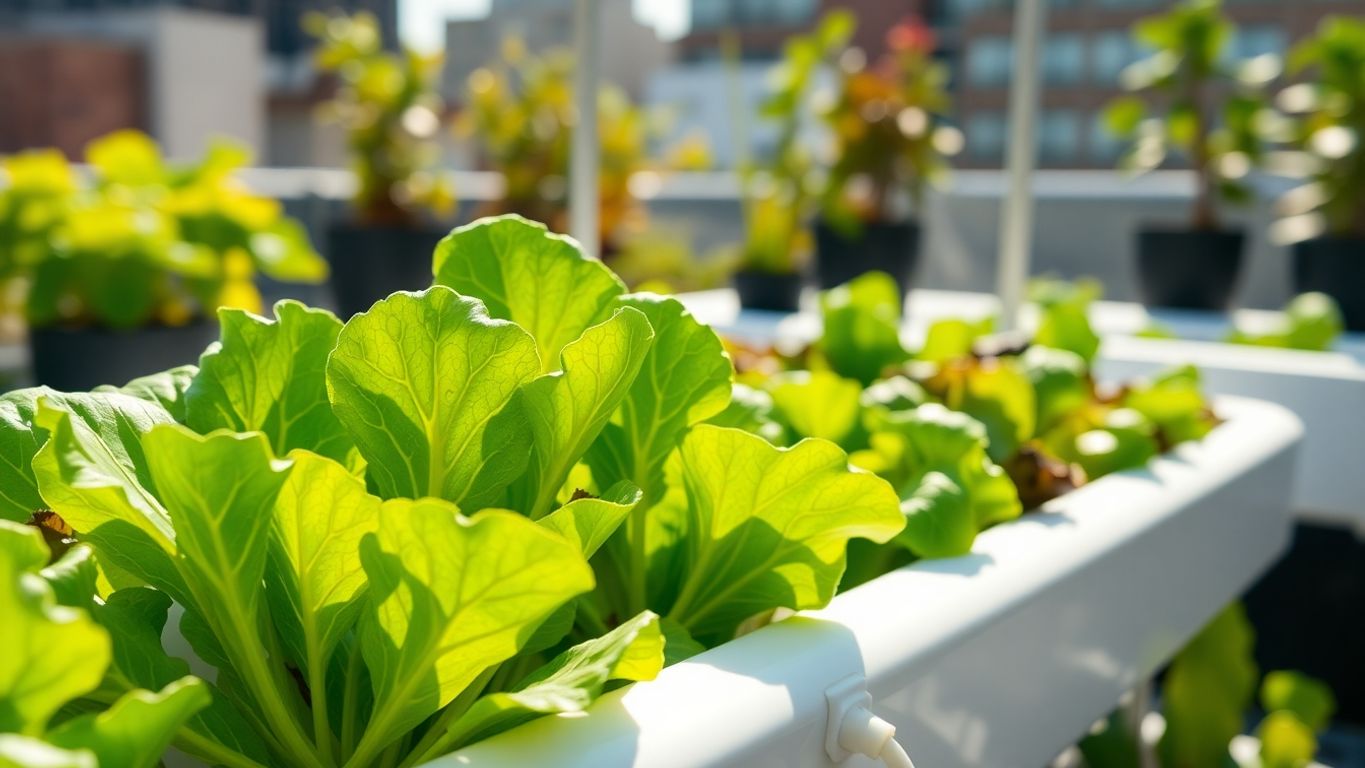
Leafy Greens Galore: Lettuce, Kale, and Beyond
Leafy greens are like the rockstars of container farming. They’re relatively easy to grow, they grow quickly, and they’re always in demand. Think about it: fresh salad ingredients right at your fingertips! We’ve had great success with:
- Lettuce (all kinds! Romaine, butterhead, you name it)
- Kale (because who doesn’t love a good kale salad?)
- Spinach (Popeye would be proud)
- Arugula (for that peppery kick)
These guys thrive in hydroponic systems, especially NFT and DWC. Plus, you can harvest them continuously, so you always have a supply of fresh greens. If you’re looking for a shipping container’s square footage, remember to factor in space for lighting and walkways.
Herbalicious: Growing Your Own Flavor Boosters
Want to take your cooking to the next level? Grow your own herbs! Not only will they taste amazing, but they’ll also fill your container farm with a delightful aroma. Some of our favorites include:
- Basil (perfect for pesto and pizza)
- Mint (mojitos, anyone?)
- Chives (a must-have for baked potatoes)
- Parsley (the ultimate garnish)
- Oregano (for all your Italian cooking needs)
Herbs are generally low-maintenance and can be grown in smaller spaces, making them ideal for container farms. Plus, imagine the bragging rights when you tell your friends you grew the basil in their caprese salad!
Fruity Fun: Strawberries and Other Sweet Surprises
Okay, this is where things get really exciting. Did you know you can grow strawberries in a container farm? It’s true! While it might require a bit more effort and attention, the reward of fresh, juicy strawberries in the middle of winter is totally worth it.
We’ve also experimented with other fruits like dwarf tomatoes and peppers, with varying degrees of success. The key is to choose compact varieties that are well-suited to hydroponic growing. Remember that larger plants may need media beds for structural support.
Here’s a quick rundown of what we’ve found works well:
| Fruit | Hydroponic System | Notes |
|---|---|---|
| Strawberries | DWC or NFT | Requires careful monitoring of pH and nutrient levels. |
| Tomatoes | Media Beds | Choose dwarf varieties and provide plenty of support. |
| Peppers | Media Beds | Similar to tomatoes, opt for compact varieties. |
The Greenbacks of Green Thumbs: Cost and Maintenance
Okay, let’s talk money. Setting up a hydroponic container farm isn’t exactly free, and keeping it running involves some ongoing expenses. But hey, think of all the money you’ll save on organic kale! (Just kidding… mostly.) We’ll break down the costs so you can see if this green dream fits your budget.
Show Me the Money: Initial Setup Costs
Alright, so how much are we really talking about? Well, it varies. A lot. Think of it like buying a car – you can get a basic model or load it up with all the bells and whistles. With container farms, the size, the tech, and the level of automation all play a huge role. We’re talking potentially anywhere from a few thousand dollars for a super basic setup to tens or even hundreds of thousands for a fully tricked-out, climate-controlled, automated system. Things that will affect the price:
- The Container Itself: Are you buying new shipping containers or repurposing an old one? Used ones are cheaper, but might need some TLC.
- Hydroponic System: DWC is generally cheaper than aeroponics, for example.
- Lighting: Grow lights can be a significant investment, especially if you’re not getting much natural sunlight.
- Climate Control: Heating, cooling, and humidity control systems add to the cost.
- Automation: Automated nutrient dosing, watering, and monitoring systems save time but cost more upfront.
Keeping the Lights On: Ongoing Expenses
So, you’ve got your farm up and running. Awesome! But the bills don’t stop there. Here’s what you can expect to pay regularly:
- Electricity: Those grow lights and pumps need power! This will likely be your biggest ongoing expense.
- Water: Hydroponics uses less water than traditional farming, but you still need a reliable source.
- Nutrients: Your plants need food! Buying nutrient solutions is a recurring cost.
- Maintenance: Pumps break, filters need changing, and things just generally need fixing. Factor in some maintenance costs.
- Pest Control: Even in a controlled environment, pests can be a problem. Budget for organic pest control methods.
Is It Worth It? The ROI of Your Indoor Farm
Okay, the big question: is all this worth it? That depends on your goals. If you’re just looking to save money on groceries, probably not. But if you’re passionate about local, sustainable food, or want to start a small business, it could be a great investment. Consider these factors:
- Yield: How much can you grow in your container farm? Leafy greens leafy greens galore are a good start.
- Market Value: What can you sell your produce for? Organic, locally grown produce often commands a premium price.
- Operating Costs: Keep a close eye on your expenses to maximize your profits.
Ultimately, the ROI of your container farm depends on your ability to manage costs, optimize yields, and find a market for your produce. It’s a business, so treat it like one! Do your research, crunch the numbers, and see if it makes sense for you. And hey, even if you don’t get rich, you’ll have a cool indoor farm and a lot of fresh veggies!
Troubleshooting Your Tiny Farm: When Things Go Sideways
Okay, let’s be real. Even with the best planning, things can go wrong. Don’t panic! We’ve all been there. Think of us as your hydroponic support group. Let’s dive into some common problems and how to fix them.
Wilting Woes: Why Your Plants Are Looking Sad
Wilting is like the universal sign of plant distress. It’s basically your leafy friends screaming, “Help me!” But what’s causing it? Here’s a few things to check:
- Water Issues: Are your plants getting enough water? Too much? Hydroponics is all about balance. Make sure your system is delivering the right amount. If you’re using Deep Water Culture, check the water level. If it’s NFT, make sure the pump is working. We’ve all forgotten to plug something in at some point, right?
- Nutrient Problems: Are your nutrient levels off? Too much or too little of something can cause wilting. Use a TDS meter to check the concentration of your nutrient solution. Remember, plants are picky eaters.
- Root Problems: Take a peek at those roots! Are they brown and slimy? That could be root rot (more on that later). Healthy roots should be white and firm.
If your plants are wilting, don’t just throw them out! Try to diagnose the problem and adjust your system accordingly. Sometimes, a little TLC is all they need.
Algae Attack! Battling the Green Slime
Ugh, algae. It’s the bane of every hydroponic farmer’s existence. It’s unsightly, it steals nutrients, and it can clog your system. But fear not! We can fight back!
- Block the Light: Algae needs light to grow, so the first step is to block as much light as possible from reaching your nutrient solution. Use opaque containers and tubing. Wrap reflective surfaces with dark material. Think of it as giving the algae a permanent night.
- Clean Regularly: Regularly clean your system to remove any existing algae. A good scrub with a mild bleach solution (make sure to rinse thoroughly!) can do wonders. We like to think of it as a spa day for your system, but for algae, it’s more like a horror movie.
- Consider Algaecides: If all else fails, you can use an algaecide specifically designed for hydroponic systems. But use them sparingly and follow the instructions carefully. We prefer natural methods, but sometimes you gotta bring out the big guns.
Root Rot Ruckus: Keeping Those Roots Healthy
Root rot is a fungal disease that attacks the roots of your plants, causing them to turn brown, slimy, and eventually die. It’s usually caused by poor oxygenation or the presence of harmful bacteria. Here’s how to prevent and treat it:
- Oxygenate, Oxygenate, Oxygenate: Make sure your roots are getting enough oxygen. This is especially important in DWC systems. Use an air stone and air pump to keep the water well-oxygenated. Think of it as giving your roots a breath of fresh air.
- Maintain a Clean System: Keep your system clean and free of debris. This will help prevent the growth of harmful bacteria. Regular cleaning is key!
- Use Beneficial Bacteria: Introduce beneficial bacteria to your system. These bacteria will compete with the harmful bacteria that cause root rot. It’s like a tiny bacterial war going on in your nutrient solution, and you want the good guys to win.
| Symptom | Possible Cause | Solution
Even the best tiny farms can hit a snag. Don’t let a little problem turn into a big headache! If your plants are looking sad or your harvest isn’t what you hoped, we’ve got simple fixes. Contact me for easy-to-follow advice that will get your garden back on track.
Conclusion
So, there you have it! We’ve gone through the whole shebang, from picking your plants to making sure they’re happy and healthy in their little container homes. It might seem like a lot at first, but trust us, once you get your hands dirty (or, well, wet, since it’s hydroponics!), it’s actually pretty fun. Think of it this way: you’re basically a mad scientist, but instead of blowing things up, you’re growing delicious food right in your own space. How cool is that? We hope this guide helps you get started on your urban farming adventure. Now go forth and grow some awesome stuff!