
Thinking about getting into mushroom farming? A shipping container mushroom farm might be just what you need. It’s a smart way to grow a lot of mushrooms without needing tons of space. This guide will walk you through everything, from picking the right mushrooms to selling your harvest.
Key Takeaways
- A shipping container mushroom farm saves space and gives you great control over the growing environment.
- Oyster, Shiitake, and Lion’s Mane mushrooms are good choices for container farming.
- Setting up your farm involves preparing the substrate, inoculating it with spores, and waiting for the mushrooms to fruit.
- Keeping the right humidity, temperature, and airflow is important for healthy mushrooms.
- Avoid common problems like contamination, not enough water, and too many mushrooms in one spot to have a successful shipping container mushroom farm.
Why a Shipping Container Mushroom Farm is Your New Best Friend
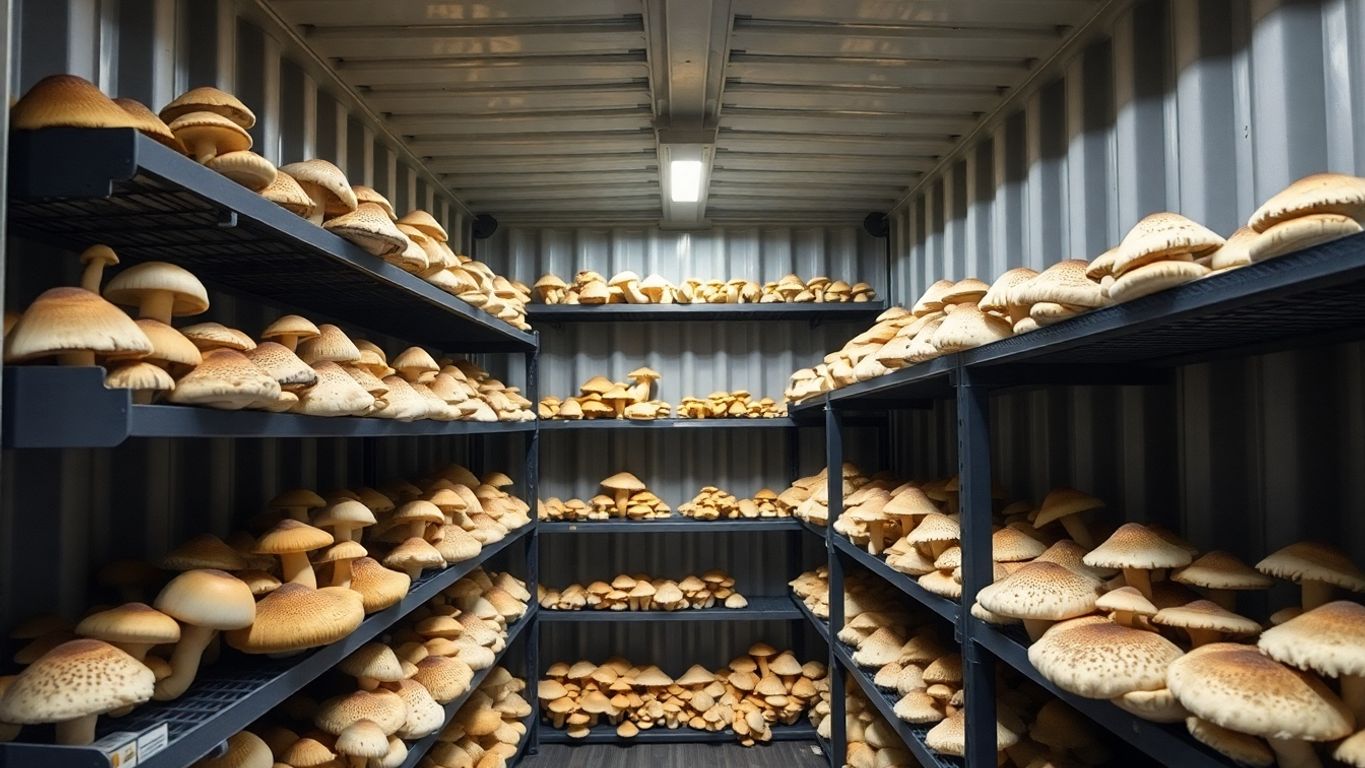
Okay, picture this: you, a cup of coffee, and a thriving mushroom farm all contained within a 20-foot shipping container. Sounds pretty cool, right? We think so too! Let’s break down why we’re so hyped about these compact fungi factories.
The Ultimate Space Saver
Seriously, space is a precious commodity these days. Apartments are shrinking, gardens are disappearing, and we’re all looking for ways to maximize what we’ve got. That’s where the shipping container comes in. It’s a self-contained unit that doesn’t require a ton of land. You can stick it in your backyard, on a small plot, or even rent a space for it. Think of it as a vertical farm, but horizontal…and made of steel. Plus, you can stack them if you’re feeling ambitious!
Climate Control, Baby!
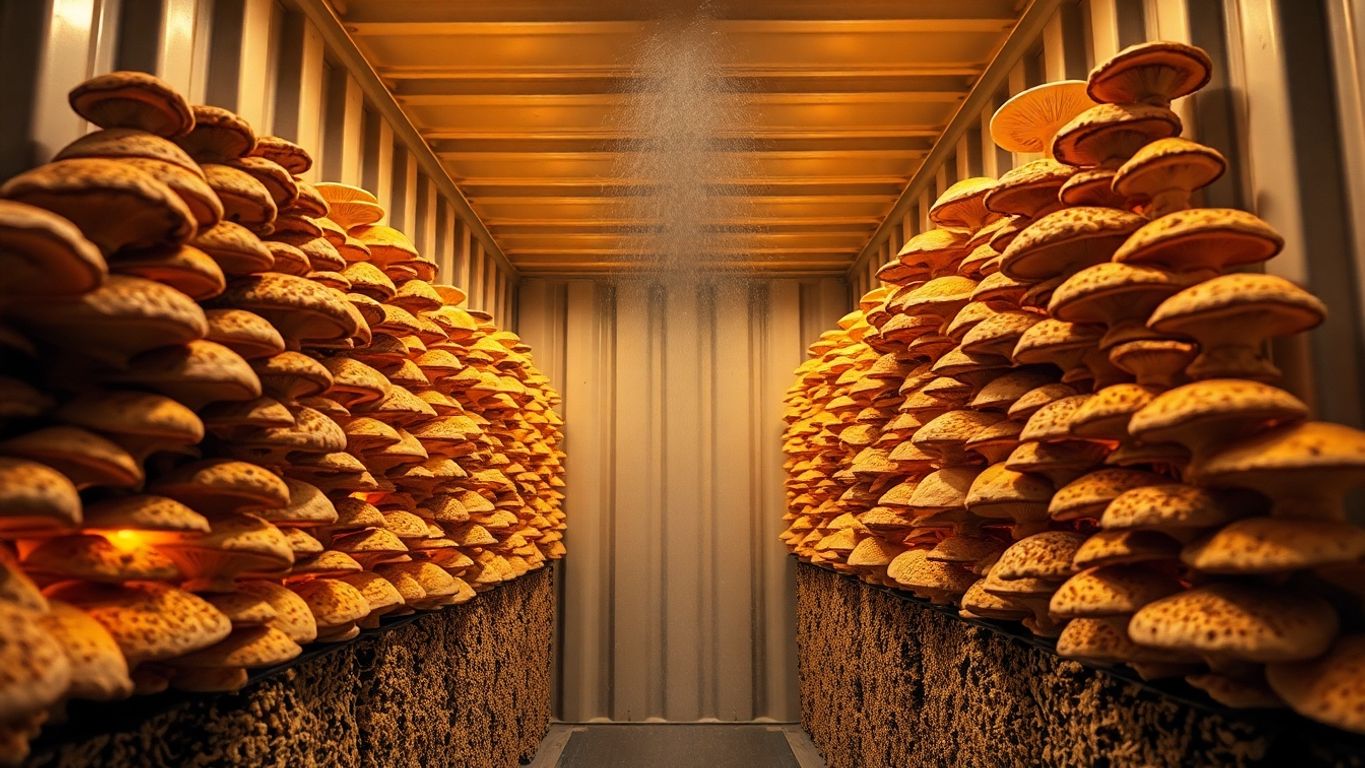
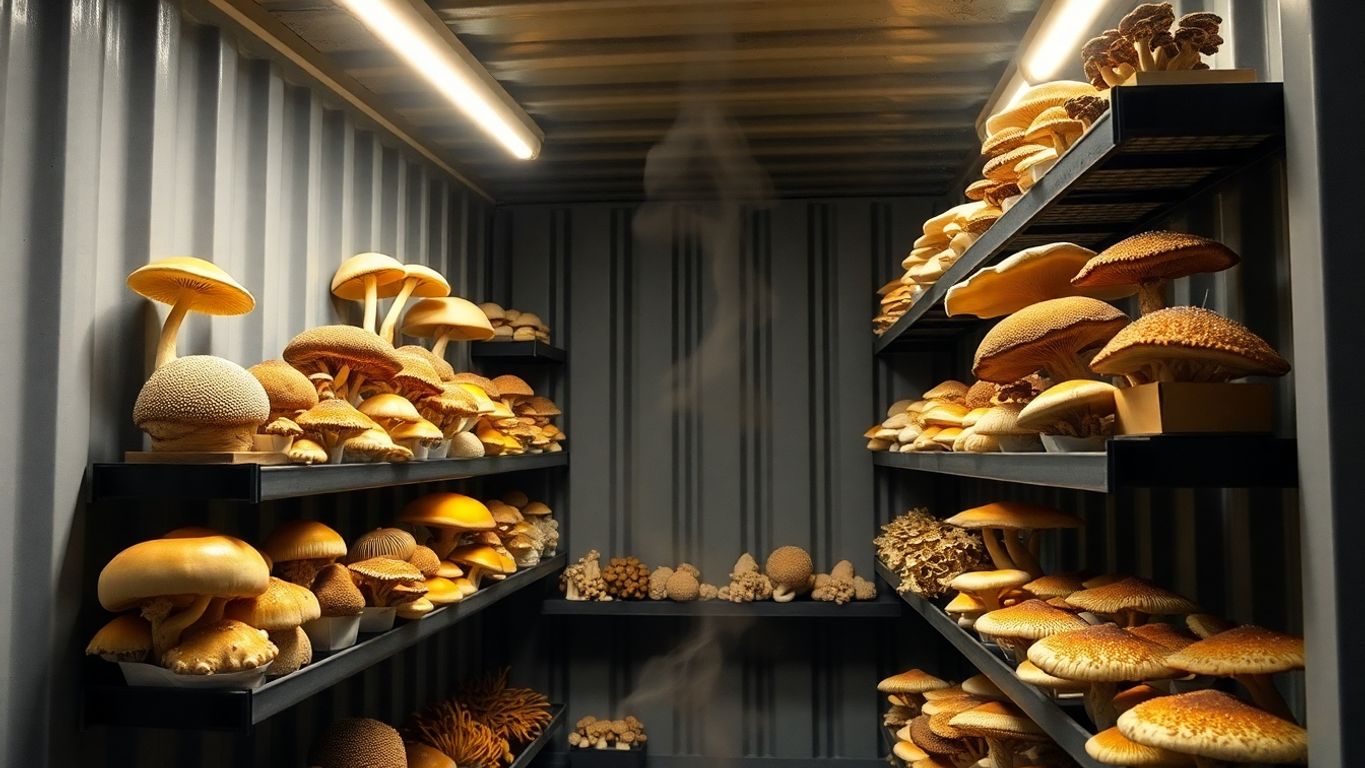
Mushrooms are picky eaters, but they’re even pickier about their environment. They need specific temperatures, humidity levels, and airflow to really thrive. And guess what? Shipping containers are basically climate-controlled boxes just waiting to be customized. We can easily insulate them, add ventilation systems, and install heaters or coolers to create the perfect fungi paradise. No more worrying about unpredictable weather ruining your crop!
Portability for the Win
Okay, this is where it gets really interesting. Let’s say you decide you want to move your mushroom farm. Maybe you found a better location, or you’re just feeling adventurous. With a shipping container, you can literally pick up your entire operation and move it! Try doing that with a traditional farm. It’s like having a mobile home, but for mushrooms. This portability gives us incredible flexibility and opens up all sorts of possibilities for [mushroom growing containers].
Think about it: you could start small, learn the ropes, and then scale up your operation by adding more containers as you grow. Or, you could even transport your mushrooms directly to farmers’ markets or restaurants, cutting out the middleman and maximizing your profits. The possibilities are endless!
Picking Your Fungi Friends for Your Shipping Container Mushroom Farm
Okay, so you’ve got your shipping container, and you’re ready to turn it into a mushroom paradise. Awesome! But before you start throwing spores around like confetti, let’s talk about which fungi are going to thrive in your new setup. Not all mushrooms are created equal, and some are way easier to grow than others, especially when you’re just starting out. We’re going to walk you through some of our favorites, the ones that are relatively low-maintenance and will give you a good return on your effort. Think of it as picking your team for the Mushroom Olympics – you want winners!
Oyster Mushrooms: The Easy-Going Crowd
Oyster mushrooms are basically the golden retrievers of the mushroom world – super friendly and adaptable. They’re incredibly forgiving, which makes them perfect for beginners. Seriously, you can grow these guys on just about anything: straw, coffee grounds, even old t-shirts (okay, maybe not t-shirts, but you get the idea). They’re also fast growers, so you won’t be waiting forever to see results. Plus, they come in a bunch of different colors – pink, yellow, blue – so they can add a little visual flair to your mushroom growing containers. Here’s why we love them:
- Easy to cultivate on various substrates.
- Fast growth cycle.
- Tolerant of a wide range of conditions.
Oyster mushrooms are a great choice if you’re new to mushroom farming. They’re relatively low-maintenance and can tolerate a wider range of environmental conditions than some other varieties. This makes them a forgiving option for beginners who are still learning the ropes.
Shiitake: The Log-Loving Legends (Now in a Box!)
Shiitake mushrooms are the cool, sophisticated cousins of the oyster mushroom. Traditionally, they’re grown on logs, but don’t worry, you don’t need a forest to grow them in your container. You can totally grow them in bags or containers with a sawdust substrate. They take a little longer to mature than oysters, but the flavor is totally worth it. They’ve got this rich, smoky taste that’s amazing in everything from stir-fries to soups. Just be a little more careful with your environmental conditions – they like things a bit cooler and more humid than oysters do.
- Rich, umami flavor.
- Can be grown in bags or containers.
- Requires a bit more attention to environmental control.
Lion’s Mane: The Brainy Beauty
Lion’s Mane mushrooms are the weirdos of the group, but in the best way possible. They look like fluffy white pom-poms, and they’re said to be good for your brain. Seriously! People claim they can improve memory and focus. Whether that’s true or not, they’re definitely delicious. They have a unique, slightly seafood-like flavor that’s amazing sautéed or made into “crab” cakes. They can be a little trickier to grow than oysters or shiitakes, but the novelty factor alone makes them worth a try. Plus, imagine telling your friends you’re growing brain-boosting mushrooms in a shipping container! Here’s a quick guide:
- Unique appearance and flavor.
- Potential cognitive benefits (allegedly!).
- Requires careful attention to humidity and airflow.
Setting Up Your Shipping Container Mushroom Farm: The Nitty-Gritty
Alright, folks, time to roll up our sleeves and get our hands dirty! Setting up your shipping container mushroom farm isn’t rocket science, but it does require a bit of planning and elbow grease. Think of it as building a tiny, fungal paradise. Let’s break it down, shall we?
Substrate Shenanigans: What Your Shrooms Will Munch On
Substrate is basically the food your mushrooms will be feasting on. It’s like the soil for your fungal friends. We’ve got a few options here, and each mushroom has its preference. Some popular choices include straw, sawdust, wood chips, and even coffee grounds! The key is to make sure your substrate is pasteurized to kill off any unwanted guests (bacteria, mold – the usual party crashers). Think of it as creating a safe space for your mycelium to thrive. Here’s a quick rundown:
- Straw: Cheap and readily available, great for oyster mushrooms.
- Sawdust: Perfect for shiitake and lion’s mane. Make sure it’s hardwood sawdust, not treated.
- Coffee Grounds: A fantastic way to recycle! Mix it with other substrates for added nutrients.
Remember, a happy substrate means happy shrooms! Don’t skimp on the quality, and always pasteurize to avoid contamination.
Inoculation Station: Spreading the Spore Love
Inoculation is the process of introducing mushroom spores or mycelium (the vegetative part of the fungus) to your prepared substrate. It’s like planting seeds, but for mushrooms! Cleanliness is absolutely crucial here. We don’t want any unwanted mold or bacteria muscling in on our mushroom party. Here’s how we do it:
- Sanitize everything: Your hands, your tools, your workspace. Think surgical theater levels of clean.
- Evenly distribute the spores or mycelium throughout the substrate. Don’t clump it all in one spot.
- Be patient: It takes time for the mycelium to colonize the substrate. Keep it in a dark, humid place and let the magic happen.
Fruiting Frenzy: When the Magic Happens
This is the exciting part – when your mushrooms finally start to pop up! Once the substrate is fully colonized (covered in white, fuzzy mycelium), it’s time to trigger fruiting. This usually involves changing the environmental conditions a bit. We’re talking about increasing humidity, introducing fresh air, and providing some light. Think of it as telling your mushrooms, “Okay, party time!” Here’s what to keep in mind:
- Humidity: Keep it high, around 80-90%. A humidifier is your best friend here.
- Temperature: Each mushroom has its ideal temperature range. Do your research!
- Airflow: Don’t let your shrooms suffocate! A small fan can help circulate the air. You can grow oyster mushrooms in buckets using this method.
| Stage | Key Factors | Tips the list of the three basic parts of the mushroom farm are: The Laboratory, The Preparation Area, and The Grow Room. The laboratory is where it all begins, and is usually the hardest part of the growing cycle for new cultivators to understand and master. Mushroom mycelium needs a moist and nutrient rich growing medium in order to develop without inhibition, such as a jar full of grain or a agar filled petri-dish. Unfortunately, these environments are also ideal growing conditions for competing bacteria and mold. If these undesirables take hold, they will usually outpace the growth of, and eventually defeat, the intended mushroom mycelium.
Environmental Zen for Your Shipping Container Mushroom Farm
Humidity: Keeping Things Moist and Happy
Okay, so humidity. Think of your mushrooms as those high-maintenance plants your aunt Carol obsesses over. They need moisture, but not so much they start growing mold (the bad kind). We’re aiming for that sweet spot, usually around 80-90% for most varieties. How do we achieve this mystical humidity level? Misters are your friend. You can get fancy automated ones, or just use a good old spray bottle. We like to keep a humidity meter handy, just to be sure we’re not accidentally creating a swamp.
Temperature: Just Right, Like Goldilocks’ Porridge
Temperature is another biggie. Too hot, and your mushrooms will throw a fit. Too cold, and they’ll just sit there, stubbornly refusing to grow. Each type of mushroom has its preferred temperature range, so do your homework! For example, oyster mushrooms are pretty chill and can handle a wider range, while shiitakes are a bit more picky. Generally, we’re looking at somewhere between 60-75°F (15-24°C) for fruiting. A small space heater or cooler can help regulate things, depending on your climate. We’ve even used insulated curtains to keep the temperature stable.
Airflow: Don’t Let Them Suffocate!
Airflow is the unsung hero of mushroom growing. It’s easy to overlook, but crucial for preventing CO2 buildup and keeping things fresh. Imagine being stuck in a crowded elevator – that’s what it’s like for your mushrooms without enough airflow. We don’t need gale-force winds, just a gentle breeze. A small fan on a timer can work wonders.
Proper airflow helps prevent contamination and encourages healthy growth. Stale air is a breeding ground for unwanted molds and bacteria, so keep that air circulating! We’ve found that even opening the container for a few minutes each day can make a big difference.
Common Blunders (and How to Avoid Them) in Your Shipping Container Mushroom Farm
Contamination Catastrophes: Keeping the Bad Guys Out
Okay, let’s be real – contamination is the bane of every mushroom grower’s existence. We’ve all been there, staring at a patch of green mold instead of beautiful, edible fungi. It’s like inviting uninvited guests to a party, and they’re eating all the snacks! The key is to be super meticulous about cleanliness.
- Sterilize everything! Your tools, your containers, your workspace – treat it like a surgical room (but, you know, less scary).
- Pasteurize your substrate properly. This kills off the competition before your mushroom mycelium even gets a chance to colonize.
- Keep the air clean. Consider using an air filter in your container to minimize airborne contaminants.
Think of contamination like a weed in your garden. If you don’t pull it out early, it’ll take over everything. Prevention is way easier than trying to fix a full-blown mold invasion.
Underwatering Woes: Thirsty Shrooms are Sad Shrooms
Mushrooms are basically water balloons with a stem, so they need their hydration! Underwatering can lead to stunted growth, dry caps, and generally unhappy shrooms. We don’t want sad shrooms, do we? Nobody wants that.
- Monitor the humidity levels in your container religiously. A hygrometer is your best friend here.
- Mist your mushrooms regularly, but don’t soak them. Think gentle rain, not a monsoon. Shipping container projects need proper planning, and watering is no exception.
- Consider an automated misting system if you’re prone to forgetting (we’ve all been there).
Overcrowding Chaos: Give ‘Em Some Space!
Imagine being crammed into a tiny elevator with a bunch of strangers – not fun, right? Mushrooms feel the same way! Overcrowding can lead to competition for resources, deformed mushrooms, and increased risk of disease.
- Don’t pack too much substrate into your containers. Give those little guys room to breathe and grow.
- Thin out your mushroom clusters if they’re getting too dense. It might feel counterintuitive, but it’ll lead to a better overall yield.
- Ensure adequate airflow within your container. This helps prevent moisture buildup and reduces the risk of fungal diseases.
Here’s a quick guide to spacing:
| Mushroom Type | Recommended Spacing (inches) |
|---|---|
| Oyster | 4-6 |
| Shiitake | 6-8 |
| Lion’s Mane | 8-10 |
Harvesting Your Bounty from Your Shipping Container Mushroom Farm
Alright, folks, the moment we’ve all been waiting for! It’s time to reap what we’ve sown (or, you know, spored) in our awesome shipping container mushroom farm. Harvesting is where the magic really comes to life, and trust us, there’s nothing quite like seeing those beautiful fungi ready for the picking. Let’s dive into the nitty-gritty of getting those shrooms from the substrate to your plate (or your customer’s plate!).
When to Pick: The Perfect Moment
Timing is everything, especially when it comes to mushrooms. Pick them too early, and they’re underdeveloped; too late, and they might get a little too enthusiastic with spore dispersal (hello, mushroom rain!).
- Oyster Mushrooms: Harvest when the caps are fully formed but before the edges start to curl upwards or release spores. They should look plump and juicy.
- Shiitake Mushrooms: Pick when the caps have fully opened, but the edges are still slightly curled under. The caps should feel firm to the touch.
- Lion’s Mane: Harvest when the teeth (those icicle-like spines) are well-developed and just starting to turn slightly pink. Don’t wait too long, or they can get a bit mushy.
Generally, keep a close eye on your mushrooms daily. They can grow surprisingly fast, and you don’t want to miss that perfect window of opportunity. It’s like waiting for the perfect avocado – patience is key, but you gotta be ready to pounce!
How to Pick: Gentle Hands, Please!
Treat your mushrooms with the respect they deserve! Rough handling can bruise them and shorten their shelf life. Plus, we want to keep the substrate happy for future flushes.
- Cleanliness is Key: Wash your hands or wear gloves to avoid introducing any unwanted bacteria. We don’t want any contamination catastrophes! Remember to keep your tools clean too.
- Twist and Pull: Gently grasp the base of the mushroom cluster or individual mushroom. Twist slightly and pull upwards. They should detach fairly easily.
- Cut if Necessary: If they’re stubborn, use a clean, sharp knife to cut them off at the base. Try to avoid leaving too much of the stem behind, as it can rot and attract pests.
Storage Secrets: Keeping Them Fresh
So, you’ve got a basket full of beautiful mushrooms. Now what? Proper storage is crucial to keeping them fresh and delicious.
- Paper Bags are Your Friend: Store your harvested mushrooms in a paper bag in the refrigerator. Plastic bags trap moisture and can make them slimy.
- Don’t Wash Until Ready to Use: Washing mushrooms before storing them can also lead to sliminess. Only wash them right before you’re ready to cook them.
- Use Within a Week: Ideally, you should use your harvested mushrooms within a week for the best flavor and texture. But let’s be real, they probably won’t last that long because you’ll be too busy eating them!
Remember, harvesting is a skill that gets better with practice. Don’t be discouraged if your first few harvests aren’t perfect. Just keep experimenting, keep learning, and keep growing! Soon, you’ll be a mushroom harvesting pro, swimming in a sea of delicious fungi.
Beyond the Basics: Advanced Tips for Your Shipping Container Mushroom Farm
Alright, so you’ve got the basics down. Your shipping container is prepped, your mushrooms are (hopefully) growing, and you’re feeling pretty good about yourself. But let’s be real, there’s always room to level up, right? Let’s talk about some advanced techniques to really make your mushroom farm sing.
Automating Your Awesome Operation
Tired of babysitting your mushrooms 24/7? Yeah, we get it. Automation is your friend! Think about investing in some gadgets to take the load off. We’re talking about things like automatic environmental control systems for humidity and temperature. These can be a bit pricey upfront, but they’ll save you a ton of time and effort in the long run. Plus, consistent conditions mean happier, more productive shrooms. It’s a win-win!
Experimenting with Substrates: Get Creative!
Okay, so you’ve been using the same old sawdust for ages. Time to spice things up! Different substrates can lead to different flavors, textures, and yields. Why not try mixing in some coffee grounds, straw, or even cardboard? Just make sure whatever you use is properly pasteurized to avoid contamination. Substrate experimentation can be a fun way to discover new and exciting qualities in your fungi.
Multiple Flushes: The Gift That Keeps on Giving
Don’t just toss that substrate after one harvest! With a little TLC, you can often get multiple flushes (that’s mushroom-speak for harvests) from the same block. After your first flush, give your substrate a good soak and let it rest for a week or two. You might be surprised at how many more mushrooms pop up. Getting multiple flushes is like finding money in your old coat pocket – a delightful surprise!
Think of each flush as a new opportunity. Keep an eye on your substrate, adjust your conditions as needed, and you’ll be swimming in shrooms before you know it. Just remember to keep everything clean and sterile to prevent any unwanted guests from crashing the party.
Making Bank with Your Shipping Container Mushroom Farm
Finding Your Niche: Who Wants Your Fungi?
Okay, so you’ve got a mushroom shipping container farm humming along. Awesome! But who’s gonna buy all these shrooms? That’s the million-dollar question (or, you know, the few-thousand-dollar question, to start). Think about it: fancy restaurants? Health food stores? Farmers markets? Maybe even direct sales to your neighbors? Knowing your target market is key. We gotta figure out who’s gonna be craving our fungi!
Marketing Magic: Selling Your Shrooms Like Hotcakes
Alright, we’ve got mushrooms, and we know who we want to sell them to. Now, how do we make them irresistible? Think beyond just slapping a price tag on ’em. We’re talking about creating a brand! Cool packaging, maybe a catchy name (
The Joys and Jitters of a Shipping Container Mushroom Farm
The Rewarding Side of Fungi Farming
Okay, let’s be real, there’s something seriously cool about growing your own food, especially when it’s mushrooms. It’s like a science experiment you can eat! Seeing those little pins pop up and then watching them grow into full-fledged fungi is strangely satisfying. Plus, you get to impress your friends with your newfound mushroom-growing skills. Who needs a green thumb when you’ve got a fungi farm?
The Hard Work Hustle
Don’t get us wrong, it’s not all sunshine and shrooms. There’s definitely some elbow grease involved. You’ve got to keep an eye on the humidity, temperature, and airflow. And let’s not forget the constant battle against contamination. It can feel like a full-time job sometimes, especially when you’re trying to troubleshoot why your shiitakes aren’t exactly thriving. But hey, no pain, no gain, right?
Embracing the Mushroom Mogul Life
So, you’ve harvested your first flush, and you’re feeling like a total boss. Now what? Well, you can start experimenting with new varieties, automating your setup, or even selling your shrooms at the local farmer’s market. It’s a journey, not a destination, and there’s always something new to learn. Just remember to enjoy the ride and embrace your inner mushroom mogul!
It’s a constant learning curve, but that’s part of the fun. We’ve learned to adapt, experiment, and not be afraid to fail. After all, even a failed batch of mushrooms can teach you something valuable.
DIY Hacks for Your Shipping Container Mushroom Farm
Repurposed Riches: Using What You’ve Got
Alright, let’s talk trash… or rather, treasure! One of the coolest things about growing mushrooms in a shipping container is how easily you can repurpose materials. Forget fancy equipment – think creatively! Old laundry baskets? Boom, mushroom containers! Discarded coffee grounds from your local cafe? Perfect substrate! We’re all about that eco-friendly, budget-conscious life.
- Old buckets make fantastic growing containers. They’re easy to source and stackable!
- Repurpose plastic bottles for smaller grows. Cut them in half, fill with substrate, and watch the magic happen.
- Use old shelving units to maximize vertical space inside your container.
Remember to always clean and sterilize any repurposed materials before using them. Contamination is the enemy!
Budget-Friendly Builds: Saving Those Pennies
Who says mushroom farm shipping containers have to break the bank? Not us! We’re all about DIY solutions that save you money without sacrificing quality. Think about it: you’ve already got the container, now it’s time to trick it out on the cheap. Here’s how we roll:
- Insulation is key. Use recycled materials like old blankets or styrofoam to keep those temps stable.
- DIY humidifiers are surprisingly easy. A simple ultrasonic humidifier can do the trick, or even a bucket of water with a towel hanging in it!
- Lighting doesn’t need to be fancy. LED shop lights are energy-efficient and provide plenty of light for your fungi friends.
Creative Container Solutions
Let’s get those creative juices flowing! Mushroom growing in shipping containers is all about thinking outside the box (or, well, inside the container). Don’t be afraid to experiment with different setups and configurations. The possibilities are endless!
| Container Type | Description | Best For |
|---|---|---|
| 5-Gallon Buckets | Easy to source, stackable | Beginners, oyster mushrooms |
| Plastic Storage Tubs | Clear, easy to monitor moisture levels | Shiitake, Lion’s Mane |
| Repurposed Cardboard Boxes | Eco-friendly, biodegradable | Short-term grows, small batches |
We’ve even seen people use old bathtubs! The key is to ensure proper drainage and airflow. So, get out there, get creative, and show us your awesome mushroom growing shipping container setups!
Want to grow your own mushrooms but don’t have a lot of space? Our DIY shipping container farm ideas are perfect for you! Learn how to turn a simple container into a mushroom-growing powerhouse. Check out our website to get a shipping container quote and start your project today!
Conclusion
So, there you have it! We’ve gone through the whole shebang, from picking the right container to making sure your little fungi friends are happy. It’s not rocket science, but it does take a bit of patience and maybe a few laughs when things don’t go exactly as planned. Remember, even if your first batch looks a bit… unique, that’s totally fine! Every mushroom farmer, even the super successful ones, started somewhere. So grab a container, get some spores, and get ready to grow some awesome shrooms. Who knows, you might just become the next big thing in the mushroom world!