
Getting a shipping container set up is pretty exciting, right? Whether it’s for storage, a cool new office, or even a tiny home, these things are super handy. But before you get too far ahead, you’ve gotta think about where it’s going to sit. Seriously, the most important part of getting your container ready is all about the ground underneath it. We’re talking about site preparation for container, and getting that right makes all the difference. If you skip this step, you could end up with a wobbly container, water problems, or even bigger headaches down the road. So, let’s walk through how to make sure your container has the best possible start.
Key Takeaways
- Picking the right spot for your container is the first big step. Think about access and what you might need later.
- Clear out all the junk and make the ground flat. No bumps or random stuff allowed.
- Make sure the soil is packed down tight. This keeps your container from sinking or shifting.
- Choose a good base for your container, like gravel or concrete, to keep it steady.
- Plan for delivery day. Make sure the path is clear for the truck and the container to get where it needs to go.
Picking the Perfect Pad for Your Pod
Alright, folks, let’s talk real estate – container style! Finding the right spot for your shipping container is like finding the perfect parking spot at the mall on Black Friday. It’s gotta be just right. We’re not just slapping this metal box down anywhere; we’re creating a foundation for something awesome. So, grab your measuring tape and your thinking cap, and let’s get started!
Scouting Out the Sweet Spot
First things first, location, location, location! We need to find a spot that’s not only accessible but also relatively level. Imagine trying to play pool in a container that’s tilting – not fun, right? Think about how the delivery truck is going to get in and out. We don’t want them tearing up your prize-winning petunias or getting stuck in the mud. Check for any overhead obstructions like power lines or grumpy squirrels who might object to their view being blocked. A container placement guide can be super helpful here.
Future-Proofing Your Container Corner
Think ahead, my friends! Are you planning on adding more containers later? Do you envision a sprawling container mansion in your future? If so, make sure you have enough space to expand. Consider things like utility access – you don’t want to be running extension cords across the yard for the next decade. And don’t forget about drainage! We don’t want your container sitting in a swamp. Here’s a quick checklist:
- Future expansion space
- Easy utility access
- Proper drainage
Planning for the future might seem like a pain now, but trust us, it’ll save you a ton of headaches (and possibly backaches) down the road. Nobody wants to move a container twice!
Checking for Pesky Obstacles
Before you get too attached to a particular spot, do a thorough check for any potential problems. Tree roots can wreak havoc on your foundation, so keep an eye out for those. Also, be mindful of underground utilities like pipes or cables. Digging into those is a surefire way to ruin your day (and possibly your neighbor’s too). And, of course, make sure you’re not building on top of a protected archaeological site – unless you’re into that sort of thing. Here’s a table to help you assess your site:
| Obstacle | Severity | Action Required |
|---|---|---|
| Tree Roots | High | Removal or relocation of container |
| Underground Pipes | High | Relocation of container |
| Uneven Ground | Medium | Leveling required |
Wrangling the Wild West of Your Yard
Alright, partners, before we even think about plopping down our metal marvel, we gotta tame the land. Think of it as giving your yard a serious makeover – container style! We’re not just talking about mowing the lawn; we’re talking full-on yard domination. Let’s get our hands dirty!
Evicting Debris and Unwanted Guests
First things first, let’s clear out the riff-raff. We’re talking about anything that’s not dirt (or supposed to be dirt). This includes rogue branches, forgotten toys, and that weird collection of garden gnomes your Aunt Mildred gifted you. Basically, if it’s in the way, it’s gotta go. You might even uncover some long-lost treasures (or, more likely, a rusty shovel). Consider this your pre-container archaeological dig. You can always use outside shipping containers for storage of the items you find.
- Remove all vegetation, including grass, weeds, and shrubs.
- Clear away any rocks, debris, or existing structures.
- Dispose of all waste properly – compost, burn (where permitted), or haul it away.
Taming the Terrain: No Bumps Allowed
Next up, we’re smoothing things out. Imagine trying to balance a shipping container on a bunch of lumpy potatoes – not ideal, right? We need a level playing field, or at least as close to level as we can get. This might involve some good old-fashioned digging, filling, and maybe even a little bit of cursing. Remember that drainage planning we talked about? Now’s a good time to revisit that and make sure water flows away from where your container will sit. You might need to build up the ground a bit to make sure water doesn’t pool around your container.
Grading is key. We want a surface that’s as flat as a pancake (a delicious, container-supporting pancake). This ensures even weight distribution and prevents any wonky settling issues down the road.
Saying Goodbye to Stubborn Stumps
Oh, the dreaded stumps. These guys are the party crashers of site prep. They’re stubborn, they’re annoying, and they’re definitely not container-friendly. You’ve got a few options here: you can try to dig them out (good luck with that!), grind them down with a stump grinder (rent one from your local hardware store), or call in a professional. Trust us, getting rid of those stumps is worth the effort. You don’t want them rotting under your container and causing problems later on. Make sure you consider the zoning and deed restrictions before you start removing trees.
- Digging: Labor-intensive, but free (except for your sweat equity).
- Grinding: Effective, but requires renting equipment.
- Professional Removal: Easiest, but most expensive.
Getting Down and Dirty with the Groundwork
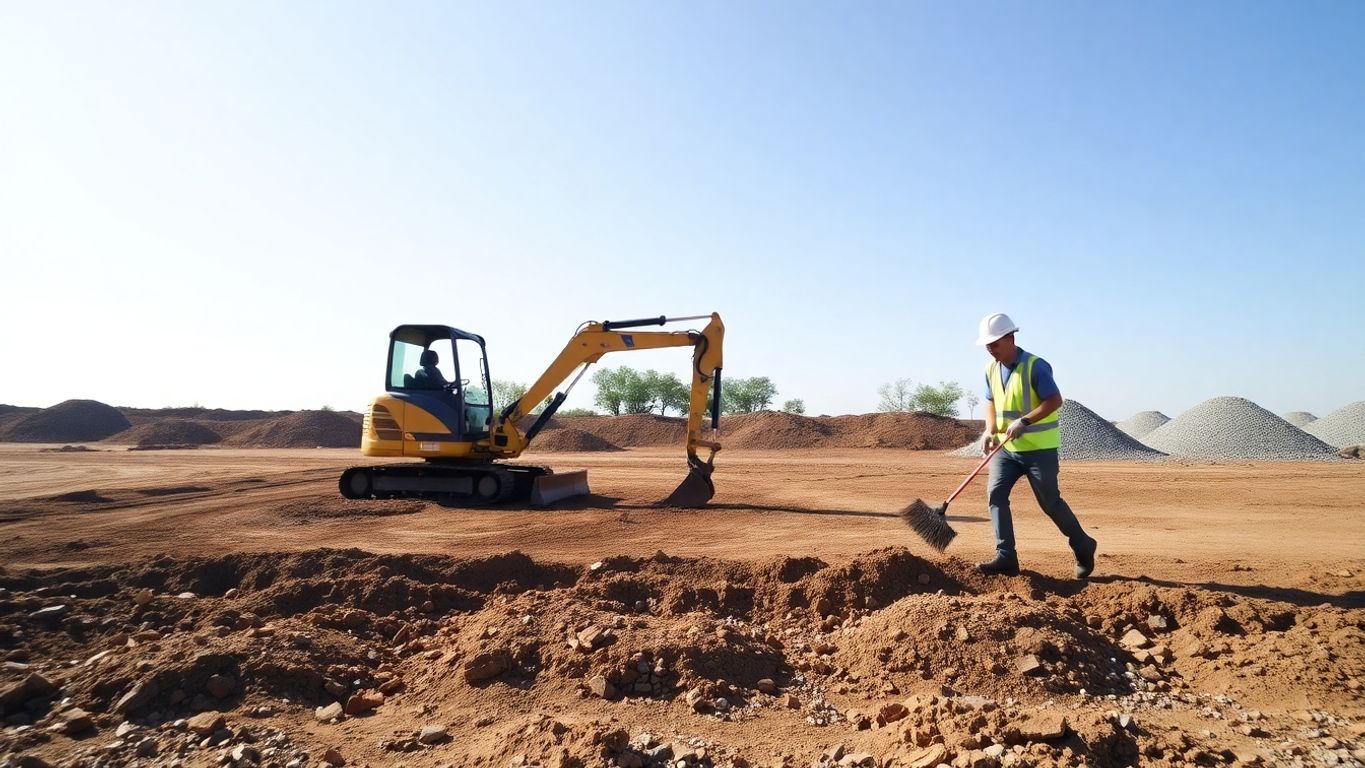
Alright, team, time to get our hands dirty! We’re not just slapping a container down and hoping for the best. Nope, we’re laying the groundwork (literally) for a solid, long-lasting setup. Think of it as building a house, but instead of bricks, we’re using a giant metal box. Let’s get started!
Understanding Your Dirt’s Personality
First things first, we need to know what kind of dirt we’re dealing with. Is it sandy, clay-like, or something in between? This is super important because different soil types react differently to moisture and weight. A simple soil test can tell you a lot. You can grab a kit online or even send a sample to a local lab. Knowing your soil type will help you choose the right container foundation and prep methods. Trust us, a little dirt knowledge goes a long way!
Making Sure Water Doesn’t Wreak Havoc
Water is the enemy! Okay, maybe not the enemy, but it can definitely cause problems if we don’t manage it properly. Proper drainage is key to preventing your container from sinking, shifting, or rusting. We need to make sure water flows away from the container, not towards it. This might involve grading the land, installing drainage pipes, or even building a French drain. Think of it as giving the water an easy escape route.
Compacting for a Rock-Solid Foundation
Once we’ve dealt with the water situation, it’s time to compact the ground. This means making the soil as dense and stable as possible. We want to avoid any settling or shifting down the road. For smaller areas, a hand tamper might do the trick. But for larger sites, you might want to rent a plate compactor. These things are like giant vibrating pancakes that squish the ground into submission. A good site prep checklist will include this step. Remember, a solid base equals a happy container!
Building a Bed Fit for a Beast
Alright, team, now we’re talking! We’ve prepped the ground, and now it’s time to lay down a foundation that’ll make your shipping container feel like it’s sleeping on a cloud… a very sturdy, weather-resistant cloud. Think of it as building a super-strong base for your metal masterpiece. Let’s get into the nitty-gritty of creating a bed fit for our container beast!
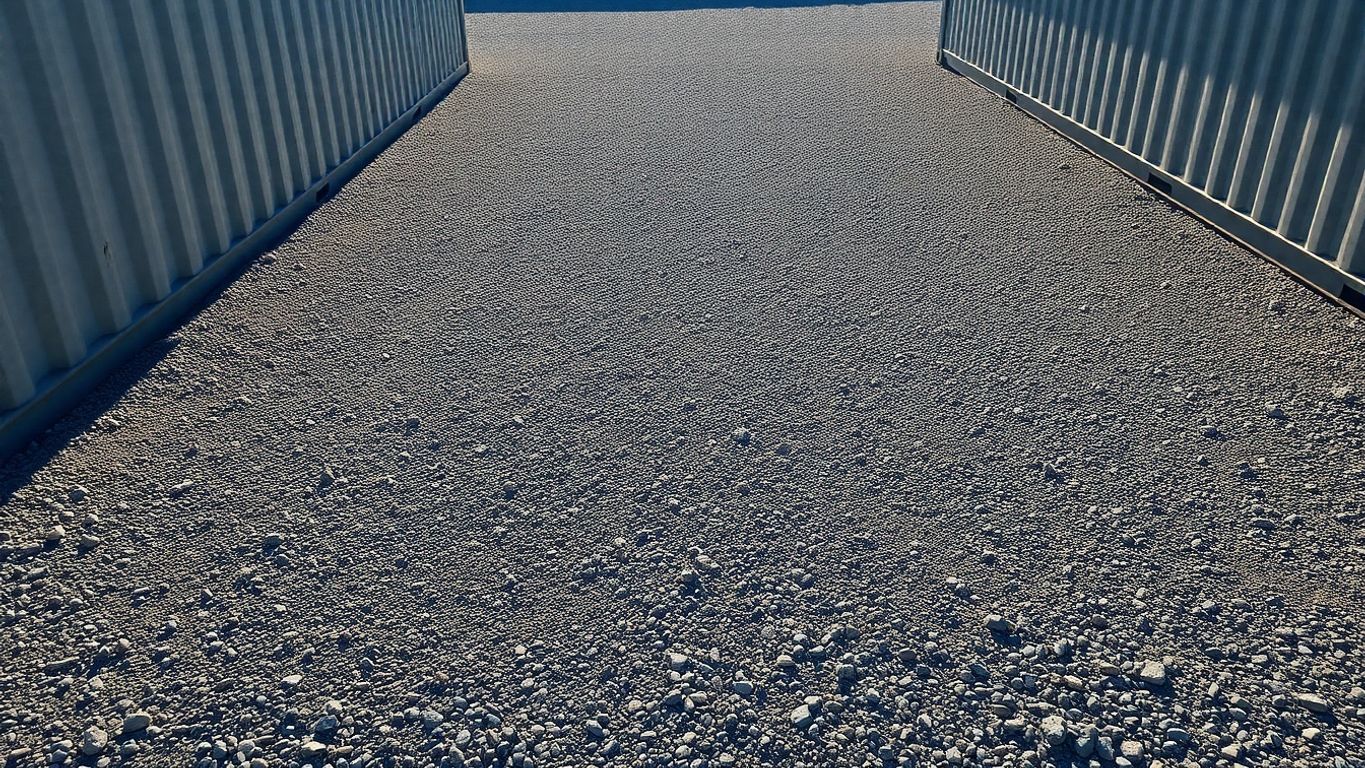
Gravel: The Unsung Hero of Foundations
Gravel: it’s not glamorous, but it’s the backbone of many great container foundations. It’s like the Switzerland of building materials – neutral, reliable, and always there to keep the peace (and the water flowing). We love gravel because it’s relatively cheap, easy to work with, and provides excellent drainage. Plus, it compacts nicely, giving you a stable base to work from. Think of it as the unsung hero that prevents your container from sinking into the mud. Here’s why we’re fans:
- Excellent drainage: Keeps water away from your container’s base.
- Easy to install: No fancy tools or skills required.
- Cost-effective: Won’t break the bank.
Concrete: The Cadillac of Container Bases
If gravel is Switzerland, concrete is definitely the Cadillac. It’s the premium option, offering unparalleled strength and stability. A concrete slab is the way to go if you’re planning a permanent structure or live in an area with unstable soil. It’s a bit more work and expense, but the peace of mind is worth it. A properly poured concrete foundation will ensure your container stays put for decades. Just make sure you get the right location for your container home before you pour!
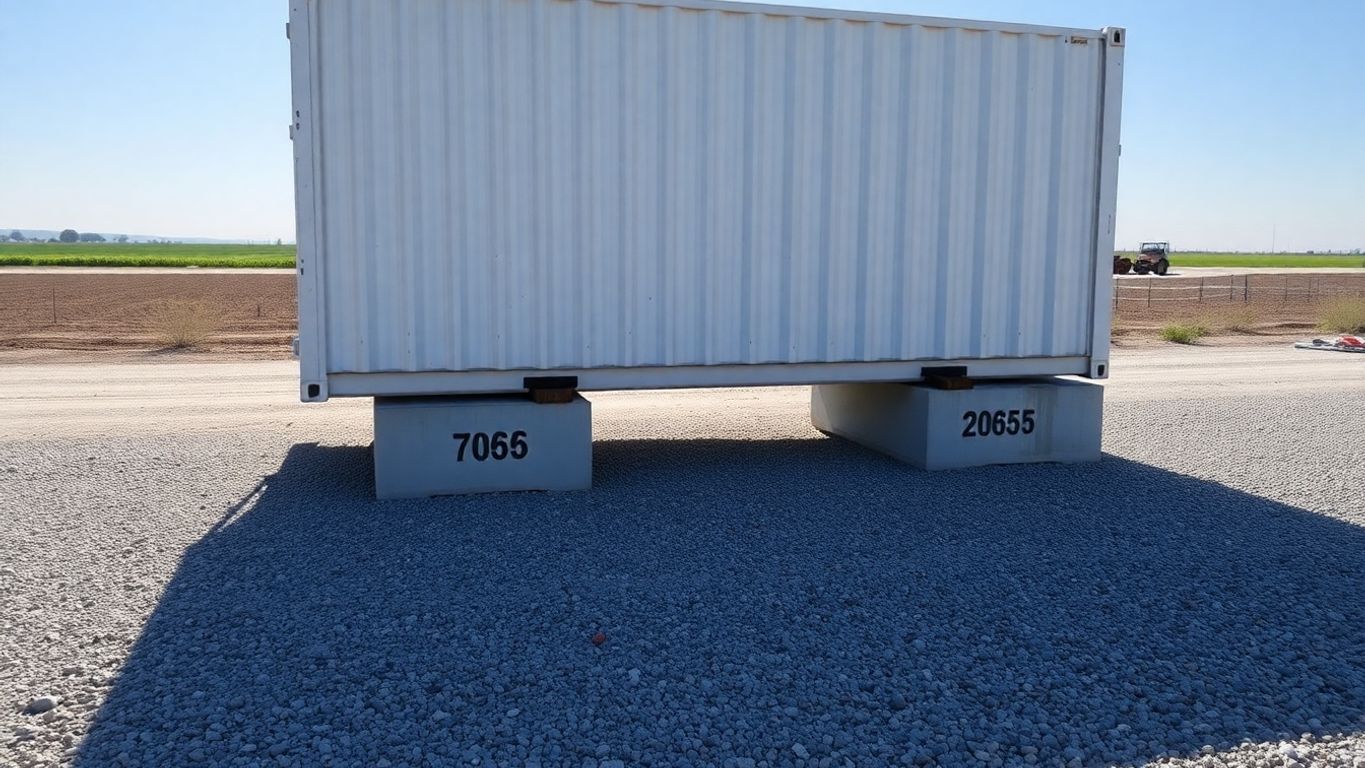
Beams and Blocks: Temporary but Terrific
Need a quick and dirty solution? Beams and blocks are your friends. This method involves using concrete blocks or wooden beams to create a raised platform for your container. It’s ideal for temporary setups or if you want to avoid pouring concrete. Plus, it allows for airflow underneath the container, which can help prevent moisture buildup. Just remember, it’s not as stable as gravel or concrete, so it’s best suited for lighter loads and shorter timeframes. Think of it as a solid, but temporary, solution for used shipping containers.
Making Way for the Metal Monster
Alright, team, the big day is almost here! We’re talking about the arrival of your shipping container, and we need to make sure it’s not a total circus getting it onto your property. This means clearing the runway, so to speak. Let’s get into the nitty-gritty of prepping for the grand entrance.
Clearing the Path for Delivery Day
First things first, we need to make sure the delivery truck can actually get to the site. This isn’t just about having a wide enough driveway; it’s about the whole route. Think about it: that truck is HUGE. We’re talking about potential traffic jams, tight turns, and maybe even some creative problem-solving. Scout the route from the main road to your property.
Mind the Branches and Steep Slopes
Low-hanging branches are the enemy! Seriously, they can scratch the container or, worse, prevent the truck from getting through. And steep slopes? Forget about it. Those can make maneuvering the truck nearly impossible. Here’s a quick checklist:
- Trim any branches that are in the way.
- Assess the slope of your driveway and access points.
- Consider if you need to temporarily flatten any areas.
Remember, a little prep work now can save you a ton of headaches (and potential damage) later. We don’t want any surprises on delivery day!
Chatting Up Your Delivery Crew
Communication is key! Before the big day, give your delivery company a call. Let them know about any potential challenges, like narrow roads or tricky turns. The more info they have, the smoother the delivery will be. Ask them about their truck size and turning radius. This will help you anticipate any issues. Also, be sure to ask about container purchase options to ensure you’re fully prepared for the delivery process.
Hooking Up Your Habitat
Alright, so you’ve got your container prepped and ready. Now comes the fun part: turning it into a livable space! This means getting all those essential utilities hooked up. Let’s dive in, shall we?
Powering Up Your Portable Palace
First things first, electricity! Unless you’re planning on living like a hermit (no judgment if you are), you’ll need to get your container wired. We’re talking lights, appliances, maybe even a fancy espresso machine. Check with your local power company to see what’s involved in getting a power connection. They’ll probably want to inspect your setup to make sure everything is up to code. Don’t skimp on this step; faulty wiring can lead to some seriously shocking situations.
- Contact your local utility company.
- Get an electrician to inspect your container.
- Ensure all wiring meets local codes.
Water, Water Everywhere (Hopefully)
Next up: water. You’ll need it for drinking, showering, and, let’s be honest, flushing. If you’re lucky, you can tap into the municipal water supply. If not, you might have to consider drilling a well or installing a water tank. Both options have their pros and cons, so do your research. And don’t forget about wastewater! You’ll need a septic system or a connection to the sewer line. Nobody wants a stinky container.
Getting water to your container can be a bit of a headache, especially if you’re off the beaten path. Make sure you factor in the cost of installation and any ongoing fees. It’s also a good idea to have a backup plan in case of emergencies.
Staying Comfy with HVAC Considerations
Let’s talk climate control. Shipping containers aren’t exactly known for their insulation, so you’ll need a way to keep cool in the summer and warm in the winter. HVAC systems are a must. Consider a mini-split system for efficient heating and cooling. You might also want to think about insulation to keep those energy bills down. Trust us, you don’t want to be sweating buckets or freezing your you-know-whats off. Proper insulation is key to maintaining a comfortable living space.
| HVAC Option | Pros | Cons |
|---|---|---|
| Mini-Split System | Efficient, quiet, individual zones | Higher upfront cost |
| Window AC Unit | Affordable, easy to install | Noisy, less efficient |
| Portable Heater | Cheap, easy to move | Not suitable for large spaces |
Playing by the Rules: Permits and Paperwork
Alright, folks, let’s talk about the not-so-thrilling, but super important, part of this whole shipping container adventure: permits and paperwork. We know, we know, it’s about as exciting as watching paint dry, but trust us, skipping this step can lead to some serious headaches down the road. Think fines, delays, and maybe even having to tear down your hard work. Nobody wants that!
Temporary vs. Permanent: What’s the Diff?
First things first, you gotta figure out if your container project is considered temporary or permanent. This distinction makes a HUGE difference in the types of permits you’ll need. A temporary setup, like for storage during a move, might have fewer requirements than a permanent dwelling. Permanent structures usually involve more rigorous inspections and compliance with building codes. Think about it: are you just plonking down a box for a few months, or are you planning on turning it into your forever home? That’s the key question.
Navigating the Permit Maze
Okay, so you’ve decided on temporary or permanent. Now comes the fun part: figuring out which permits you actually need. This is where things can get a little… complicated. Every city, county, and sometimes even homeowners’ association has its own set of rules and regulations. It’s like trying to solve a Rubik’s Cube blindfolded! Here’s a general idea of what you might encounter:
- Zoning permits: These determine what you can build on your property. Make sure your container project aligns with local zoning laws.
- Building permits: These ensure your structure meets safety standards. Think structural integrity, electrical, and plumbing.
- Electrical permits: If you’re planning on wiring up your container, you’ll likely need an electrical permit.
- Plumbing permits: Same goes for plumbing. Nobody wants a leaky container!
It’s always best to start by contacting your local planning and zoning department. They can provide you with a list of required permits and guide you through the application process. Don’t be afraid to ask questions! They’re there to help (hopefully).
Avoiding Fines and Headaches
So, what happens if you decide to skip the permit process altogether? Well, let’s just say it’s not a gamble worth taking. At best, you’ll get a warning and be forced to apply for permits retroactively, which can be a pain. At worst, you could face hefty fines, legal action, or even be ordered to remove your container. Not fun! To avoid these unpleasant scenarios, here’s our advice:
- Do your research: Contact your local authorities early in the planning process to understand the standard dimensions and requirements.
- Be honest and upfront: Don’t try to hide anything or cut corners. Transparency is key.
- Keep good records: Document everything, from permit applications to inspection reports.
Remember, a little bit of planning and paperwork can save you a whole lot of trouble in the long run. So, grab a cup of coffee, put on some relaxing music, and get ready to tackle the permit maze. You got this!
Protecting Your Precious Cargo
Alright, so you’ve got your site prepped, your container delivered, and now it’s time to think about keeping everything in tip-top shape. We’re not just talking about aesthetics here; we’re talking about protecting your investment from the elements and unwanted guests. Let’s dive in!
Keeping Moisture at Bay
Moisture is the ultimate enemy of steel. Think rust, mold, and general ickiness. Here’s how we fight back:
- Proper Ventilation: Make sure your container can breathe. Install vents to allow air to circulate and prevent condensation.
- Seal the Deal: Inspect your container for any gaps or cracks, especially around doors and windows. Use sealant to close them up tight.
- Consider a Vapor Barrier: If you’re insulating the inside, a vapor barrier is a must. It prevents moisture from getting trapped in the insulation.
Preventing Pesky Pests
Mice, rats, insects – they all love a cozy container home. Let’s make sure they find somewhere else to crash.
- Seal Entry Points: Just like with moisture, seal any potential entry points. Pay special attention to the floor and corners.
- Elevate Your Container: Keeping your container off the ground makes it harder for pests to climb in.
- Regular Inspections: Check your container regularly for signs of infestation. Early detection is key.
Ensuring Long-Term Stability
We want your container to last for years to come, right? Here’s how we make that happen:
- Proper Foundation: We’ve already talked about this, but it’s worth repeating. A solid foundation is crucial for long-term stability.
- Regular Maintenance: Inspect your container regularly for rust, damage, or any other issues. Address them promptly to prevent further problems.
- Consider Protective Coatings: Applying a protective coating can help prevent rust and corrosion, especially in harsh environments.
Think of your container like a car. You wouldn’t just drive it and never change the oil, would you? Regular maintenance and preventative measures are key to keeping your container in good condition for years to come. Treat your container right, and it’ll treat you right.
The Importance of a Solid Start
Okay, so you’re probably thinking, “Ground prep? Sounds boring!” But trust us, this is where the magic really happens. Think of it like this: you wouldn’t build a house on a shaky foundation, right? Same goes for your shipping container dream!
Why Ground Prep Isn’t Just for Grumps
Seriously, we’re not just being fussy. Proper ground preparation is the unsung hero of container projects. It’s what keeps your container level, prevents rust, and stops the whole thing from sinking into the earth like some kind of metal swamp monster. Plus, it helps with drainage, which is a big deal unless you want your container to become a swimming pool.
Saving Your Sanity (and Your Wallet)
Skipping ground prep might seem like a way to save a few bucks upfront, but oh boy, will you regret it later. We’re talking potential structural damage, expensive repairs, and a whole lot of headaches. Imagine having to jack up your entire container because it’s leaning like the Tower of Pisa. Not fun, right? A little effort now can save you a ton of money and stress down the road.
Making Your Container Dream a Reality
Ultimately, ground prep is about setting yourself up for success. It’s about creating a stable, long-lasting foundation for whatever you plan to do with your container – whether it’s a home, an office, or a super-cool storage space.
Think of it as an investment in your future happiness. A well-prepared site means a happy container, and a happy container means a happy you. So, let’s get digging!
Getting off to a good start is super important for anything you do. It sets the tone and makes everything else easier. If you want to learn more about how to start strong, contact me for quotes, helpful tips, and expert advice.
Conclusion
So, there you have it! Getting your site ready for a shipping container might seem like a lot, but trust me, it’s way better than having your awesome new container slowly sink into the mud or, even worse, tip over like a clumsy giant. Nobody wants that kind of drama. Take your time, follow these steps, and you’ll be chilling in your new container space, or storing your stuff, or whatever cool thing you’re doing, without a single worry. It’s all about setting yourself up for success, and maybe avoiding a few embarrassing calls to a crane company. You got this!